Pages

Oct 1, 2013

Clay Skull DIY

This is an easy way to make a versatile clay skull, even if you have zero clay sculpting experience (like me). 

Dollar Tree had these silicone ice cube trays shaped like skulls.  I bought one and tried a couple of different ideas that didn't work, and then I came up with this.

To make one, you'll need:

Silicone skull mold
Black polymer clay (I used Sculpey III)
Corn starch
Parchment paper
Paint or paint pens (I just used black and white)
Gloss spray (I used glossy lacquer)

I dusted mine with corn starch (just like you'd dust a cake pan) just to ensure there would be no sticking. 

I worked on parchment paper for this project.  Knead the clay in your hands and form a ball roughly the size of the mold.  Starting in the center, press the clay into the mold.  Be sure you press it firmly in, and get the back as flat and even with the mold edges as possible.

Carefully unmold the clay.  Mine slid right out.  Then, on a parchment-covered cooking sheet, cure in the oven according to package instructions and let cool when it comes out.   I took a damp paper towel to wipe off any remaining corn starch from the finished piece.

Now it's time to jazz it up.  I simply used a paint pen with a chiseled tip and a Micron black pen.

I started with the white areas and let it dry.

Then I went in with the black for more details.  Here I also worked again on any white spots that looked messy and used the black to go over and cover up any stray white parts I didn't like.

Let that dry, then spray with clear gloss.  Start from pretty far away and give a LIGHT mist.  This will help keep the designs from running.  Let it dry, and repeat the process until you get the glossiness you want.  Let it dry.  You don't HAVE to gloss it, but it makes a huge difference and brings out the contrast more.

Now you can use this guy for jewelry or other embellishing, like I did here below.  If you'd like to make this particular embellishment, just glue it to a felt flower.  You can click here for quick instructions on making a couple of versions of felt flowers.

Happy Halloween Season!


Sep 30, 2013

Make Felt Flowers


Here's a quick and easy way to make felt flowers for decorating and embellishing.  This tutorial shows two different styles.  

You'll need:

1 sheet of felt (or more if you're doing different colors)
Felt glue and/or hot glue
Scissors
Card stock in coordinating colors

We'll start with the orange loopy flower.

Fold one edge of felt over lengthwise.  Cut out this piece, but don't cut along the fold.

Using felt glue or hot glue, glue the unfolded edge to itself.
Make evenly-speced cuts all along the length of the felt, through the fold but not all the way to the glued edge.

Cut out a circle of felt or card stock.  Put your choice of adhesive all over the circle.  Starting with one edge of felt, lay it down along the edge of the circle, following the edge of the circle.  When you have gone all the way around, continue winding toward the middle and sticking it down.


Using another piece of card stock, apply adhesive to the entire surface (here I used adhesive tape on a shape I cut out with a puncher, but you can use whatever you like).  

Press that into the middle of the flower and ta-daaa!

For the black flower, it's the same procedure, except I cut down the fold after gluing the edges together, and I made the cuts more closely spaced.


"Fluff up" the petals, and you're done....

...UNLESS you want to take it up a notch and add another embellishment like this.  Click here to see how I made the skull, or click here to see how I used this on a wreath.

Enjoy!


Halloween Tissue Paper Wreath

Today I'll share how I made this tissue paper wreath for Halloween, spending very little money to do it.


You'll need:
Wreath Form (mine is from Dollar Tree)
Scissors
Orange Tissue Paper
Pipe Cleaners in Orange and Black (I used yellow, but you should use orange if possible.)
Stapler
Halloween Embellishment (mine is handmade, but you could use a store-bought one if you like)
Glue Gun with Glue Sticks
Ribbon or String


To start, cut four strips lengthwise from one sheet, then repeat on a second sheet.  Kind of scrunch these up and use to wrap around the wreath form.  You can pin or glue the ends as you wrap.

Next, leaving the remaining sheets of tissue paper stacked (mine came with 10 sheets, so after I used the paper to wrap, I had 8 sheets stacked.)  Cut squares or rectangles.  Mine were about 4 x 6 inches each.  It doesn't matter if these are perfect, and even if it's on a fold, it's okay.  Then cut off the corners so you wind up with something similar to this:

With each set of squares, staple the middle of a pipe cleaner to the center of the flower.  You can staple it twice if you like.

Starting with the top layer, just squish it up like in the photo below.  Repeat with each layer, loosening up with each layer.  I didn't even squish up the bottom layer.

Next you'll attach the tissue to the wreath by wrapping the pipe cleaners around and twisting.  If you use orange pipe cleaners, you're good here.  I didn't, so I had to go back with more tissue paper, gluing over the pipe cleaners to hide the yellow. 


Your wreath might not be round enough here, so you can easily adjust at this point.  Also, if you have any pieces of tissue that seem too big or stick out, just snip them down here.

I glued a pipe cleaner to the back of this embellishment, then wrapped it around.

For a little something extra, I made some pipe cleaner swirls from black pipe cleaners, then glued those to the wreath form with hot glue.  After I handled them, they needed to be evened out a little after they were glued on.

Use a final pipe cleaner to make a hook on the back if you're planning to hang it by a ribbon.  Then just tie on a ribbon or string, hang it up, and enjoy the festive touch!  This smaller size wreath is great for a kitchen.  I hung it on a corner cabinet in my kitchen, and it looks great!


Like the skull embellishment?  I'll be showing how to make that next, so check back here soon!


Sep 25, 2013

Make a Keepsake Card on Canvas!


Necessity is the mother of invention, they say.  Well, I proved this true this week!

My mom's 70th birthday is very soon and my siblings and I and our spouses have been in cahoots over what gift we would get her and how we would celebrate.  None of us live in the same town, so this was all done over email and text messages.  We finally came up with a lovely keepsake piece of jewelry that I think our mom will love.  I can't wait for her to receive it!

But just a few nights ago I was struck by the realization that she would probably LOVE to also receive something fun and handmade from the grandchildren.  My first thought was to make a "Happy Birthday" banner on butcher roll that the kids and I could decorate, roll up and send.  Alas, the roll of butcher paper was nowhere to be found!  But lucky me!  In all my searching, I found a few cheap canvases that I had purchased last year for the kids to use.  We'll paint that instead!

Alas again!  All my acrylic paints were dried up (Can you tell I'm not the crafty one on this blog?!  Charlotte would never be out of paint!).
Sharpies to the rescue!  We'll make a birthday sign on the canvas with sharpies!

I wrote the initial message and then had the children color it, make designs and sign their names.  I really like how it turned out so far.  I think I'll have the kids add the finishing touches today after school.


I can think of so many fun variations of this project!
* Use a smaller canvas and make a decoupage birthday card/sign for a child or a friend.
* Use the larger canvas to make a seasonal decoration to be used year after year, using paints/sharpies/decoupage.
* Make a birthday sign for the family, similar to the "You Are Special Today" plate.

I plan to attach a hanging strip in the back and send it on to my mother.  I have a feeling she's going to love it!


Sep 23, 2013

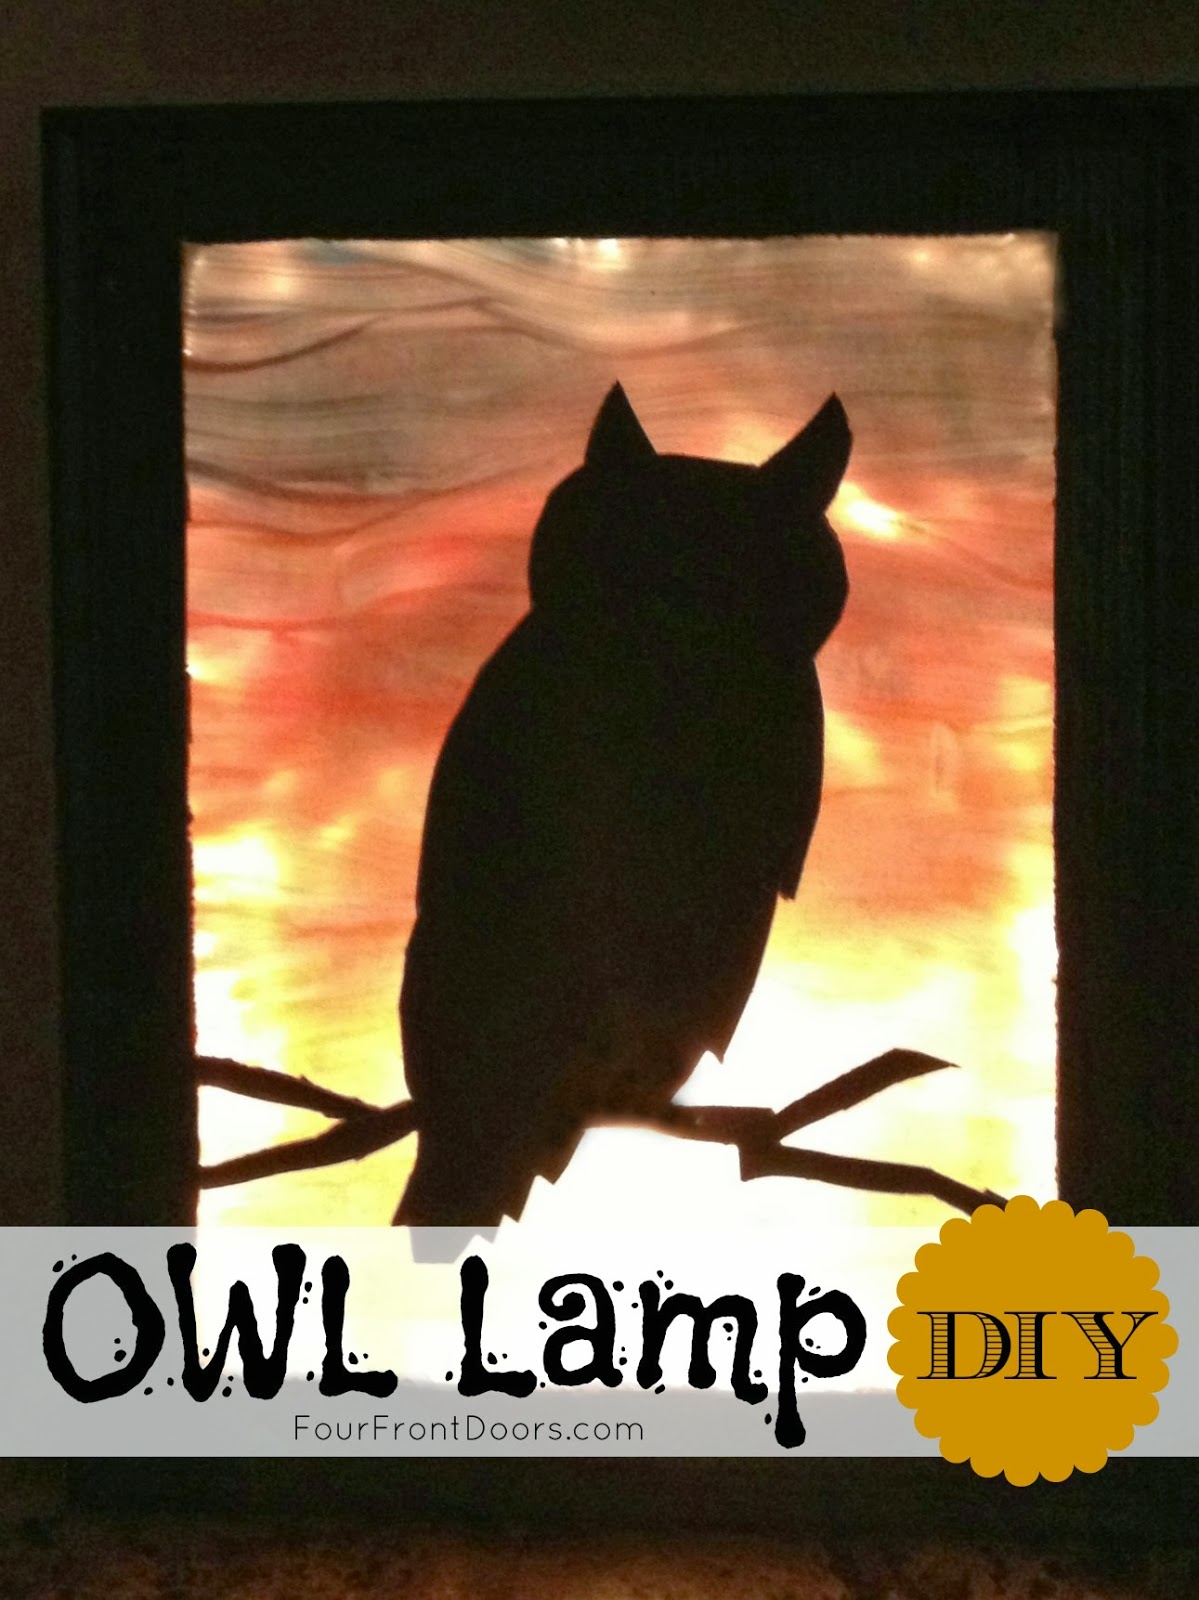
Owl Lamp DIY


I love owls, and I think Halloween is so much fun.  That inspired me to create this owl lamp.  This is an easy project that looks impressive when finished.  

To make your own, you'll need:

  • 11x14 Picture Frame from Dollar Store
  • Disposable Cake Pans from Dollar Store (usually come 2 in a pack)
  • Single Clip Light from Dollar Store
  • Wax Paper and Parchment Paper
  • Mod Podge Glossy
  • Food Coloring in red, yellow, blue
  • Paint Brush
  • X-Acto Knife
  • Wax Paper
  • Duct Tape

1.  Spoon Mod Podge into paint wells or plastic cups.  

Add 2 drops yellow to one, two drops red to one, one drop each red and yellow to one, and two drops blue to one. Gently stir with plastic spoon or toothpick to blend color.

2.  Take the glass pane out of the frame.  Place it on a sheet of parchment paper.  Starting with the yellow, paint the bottom portion of the glass with long wavy strokes.  Then paint up to about the halfway point with orange, and the top half with red.  Let it dry just enough to get tacky.  This way you can go back over it for better coverage.

3.  Go back over the yellow, orange, and red, and go over the top with blue.  Use the brush to blend everything in.  Don't worry about visible brush lines, because for this project they're actually a good thing, since it's going to represent the sky and will add interest.  And don't worry if you're not good at painting.  You don't have to be!  I even let my six-year-old help with this part, so you can do it too.

 4.  Put in oven that's been preheated to 175 degrees.  I just left mine on the parchment paper and put the whole thing in.  Leave it in about 30 minutes.  The paint will become transparent and will get quite a bit darker.

5.  While that's in the oven, you can do your cutout.  I printed off a silhouette of an owl from the internet.  You can use any cardboard or card stock to fit, but what I did was use the cardboard insert that comes with the frame and turned it over to cut.  No worrying about getting the right size, and the opposite side was black, which is perfect!

I marked out a 1-inch border all around, and then cut that out and cut out the owl.  I extended the branches all the way to the border.

 6.  Use duct tape to cover any areas that you might have cut into.  This will avoid light bleeding through when it's lit.

 7.  When the glass is ready, take it out and let it cool.  Then put the cutout into the frame (black side facing out), followed by the glass.  Here you might need a drop of glue or some double-sided tape to stick down the head/body part of the owl.  You don't need much.  Then over that you'll put wax paper.  Push down the tabs in the back of the frame, and duct tape to secure the wax paper.  (Doesn't matter what the back looks like here.)

8.  Get a single clip light.  Mine is from the dollar store, but I think it's a seasonal item, so if you can't find it there, you can get one from a hardware store or online for cheap.  I like this kind of light because you can just flip the switch to turn it off and on.

 8a.  Cut a small hole in the bottom of the cake pan near a short side and in the middle, and insert the light.  I wound up duct taping around the hole to reinforce it.  I only used one pan, but two might work better and give the whole thing more stability.

 8b.  Duct tape the pan to the frame with the light at the bottom, being sure to go all the way around with the tape.

 9.  Plug it in, light it up and enjoy!

 Like it?  Pin it / Share it, please!
Enjoy!