Pages

Showing posts with label How-To. Show all posts

Oct 21, 2013

Burlap Owl Door Hanger

I'm seeing burlap door hangers everywhere, and I figured it would be fun to have one for myself!

There are lots of tutorials for these, but it's pretty easy to figure out on your own.  The main two tutorials I used were this one at Miss Kopy Kat and this one at Live a Little Wilder.  I love owls, and realized this season would be perfect for an owl hanging around!  Here's what I came up with:

Here's how I did it.

I wanted mine BIG.  I used a piece of poster board and cut out the form.  Then I traced the owl onto burlap and cut out a double thickness, allowing about an inch extra all around.  I'm not good at guessing measurements.  Maybe it's more than an inch.  I didn't measure it or make it precise.  


Next I removed the bottom layer of burlap, protected my table with newspaper, and sketched out the details of the owl. 

 Next I painted it all in with acrylic paint.  This was the part that took awhile, just because the burlap soaks up so much paint that it requires going back over it a few times.

The only colors I used for this owl were a cream, black, a dusty green, metallic gold, orange, and purple.  I also mixed a little glitter paint in with the black for a little extra dimension.  And, yeah, because I like stuff that sparkles. I mixed the green with the cream for the eye detail.

After I painted everything in, I roughly outlined the main form, wings, and eyes with a flat brush, using a very inexact mixture of gold, black and green.

For the polkadots, I just dipped a fresh pencil eraser into the paint and pressed it down.  Easy!

Here's something you might want to try if you make one of these.  I wish I'd known this tip before I started.  I've heard that if you Mod Podge the whole thing before you start, it makes the painting go much easier.  I've also heard of using an inexpensive fabric starch like Sta-Flo.  I'm thinking it couldn't hurt to try.

Now let that paint dry.  The paint is going to stiffen up that burlap like you won't believe, which is pretty good if you're hanging this outside.  

Next I hot glued the front to the back piece of burlap following the unpainted edges, working in small sections and stuffing with plastic bags as I went along.  You could also use leftover waxed paper or parchment.  If you're going to be using it indoors only, you could probably use fabric or tissue paper or even newspaper.  If it's going outside, be sure you use something more water-resistant.

After I got the whole thing stuffed and glued, I took a piece of floral wire and stuck it through burlap's weave in the back and twisted the ends around to hold it in place.  You can leave the ends out the front and curl them, but I felt like there was enough detail on mine that I'd leave the wire ends on the back.

I didn't use any kind of sealant on mine, because my front porch is covered and pretty protected, but feel free to seal yours if you like.

Now go hang that on a wreath hanger on your door, and enjoy looking at it whenever you step outside!


Like it?  Feel free to Pin it!

Sep 23, 2013

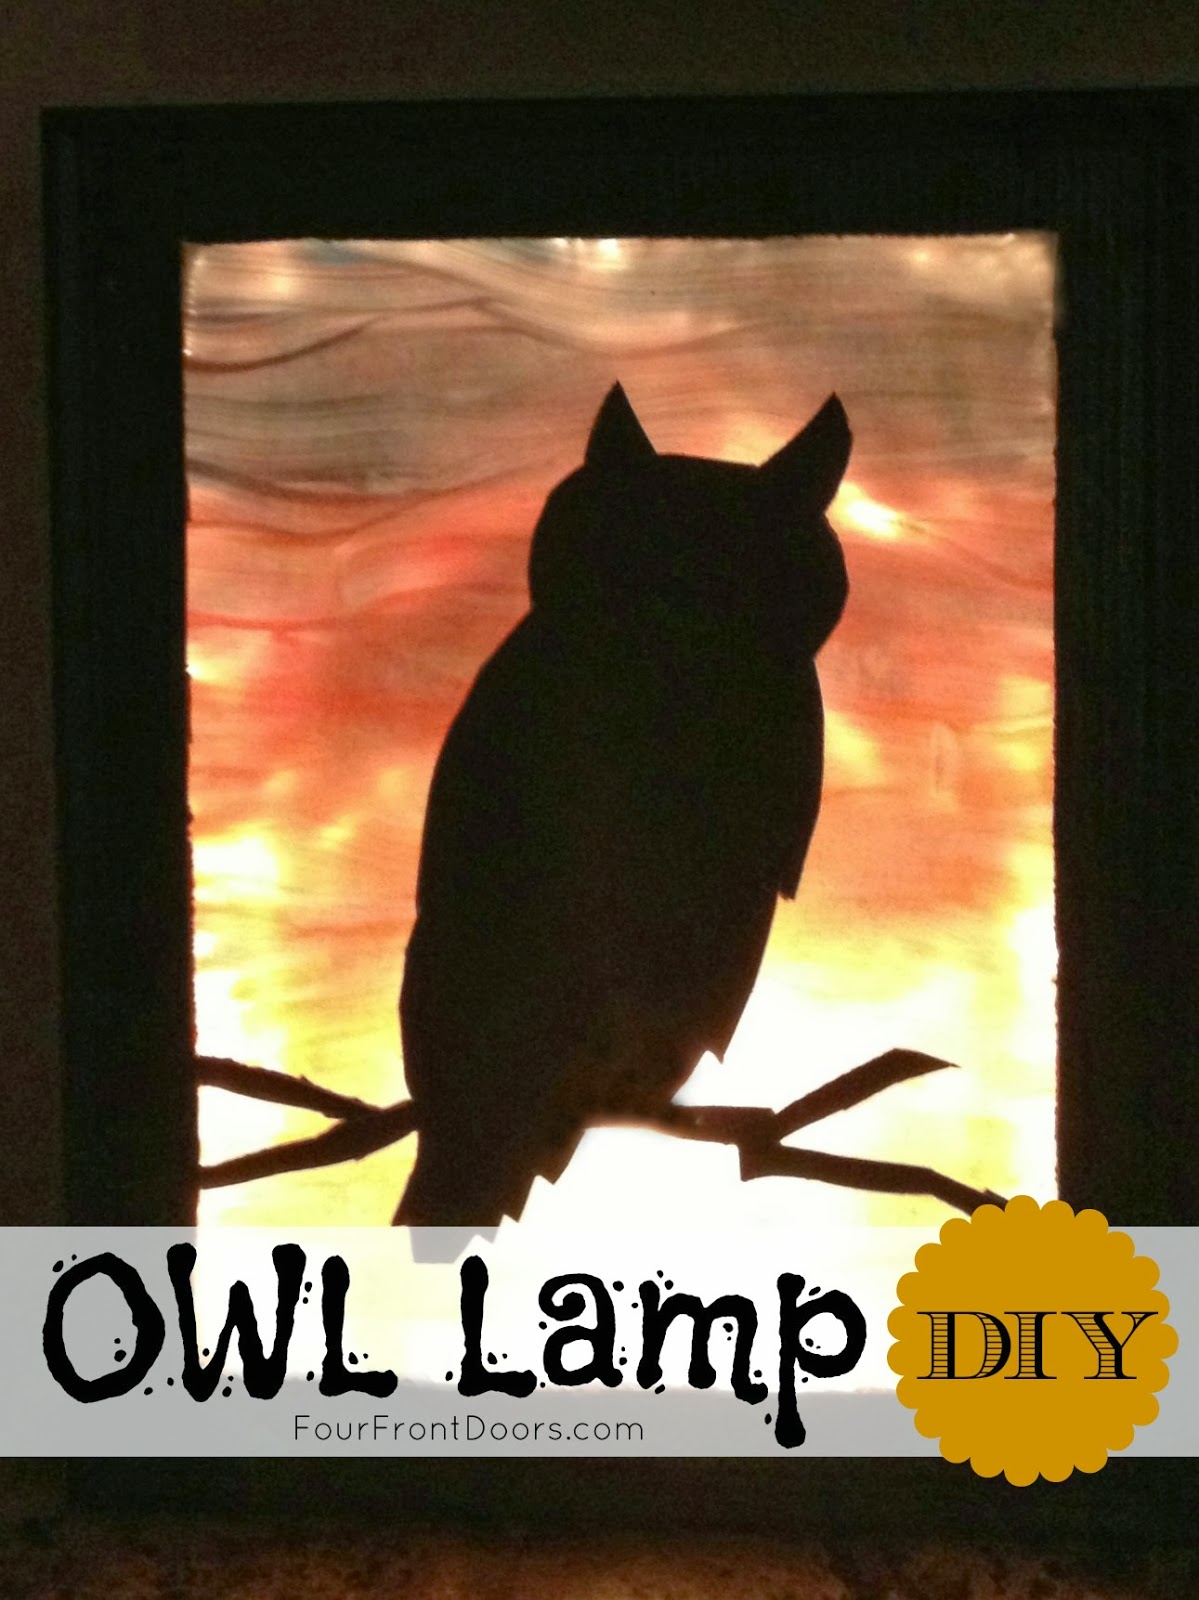
Owl Lamp DIY


I love owls, and I think Halloween is so much fun.  That inspired me to create this owl lamp.  This is an easy project that looks impressive when finished.  

To make your own, you'll need:

  • 11x14 Picture Frame from Dollar Store
  • Disposable Cake Pans from Dollar Store (usually come 2 in a pack)
  • Single Clip Light from Dollar Store
  • Wax Paper and Parchment Paper
  • Mod Podge Glossy
  • Food Coloring in red, yellow, blue
  • Paint Brush
  • X-Acto Knife
  • Wax Paper
  • Duct Tape

1.  Spoon Mod Podge into paint wells or plastic cups.  

Add 2 drops yellow to one, two drops red to one, one drop each red and yellow to one, and two drops blue to one. Gently stir with plastic spoon or toothpick to blend color.

2.  Take the glass pane out of the frame.  Place it on a sheet of parchment paper.  Starting with the yellow, paint the bottom portion of the glass with long wavy strokes.  Then paint up to about the halfway point with orange, and the top half with red.  Let it dry just enough to get tacky.  This way you can go back over it for better coverage.

3.  Go back over the yellow, orange, and red, and go over the top with blue.  Use the brush to blend everything in.  Don't worry about visible brush lines, because for this project they're actually a good thing, since it's going to represent the sky and will add interest.  And don't worry if you're not good at painting.  You don't have to be!  I even let my six-year-old help with this part, so you can do it too.

 4.  Put in oven that's been preheated to 175 degrees.  I just left mine on the parchment paper and put the whole thing in.  Leave it in about 30 minutes.  The paint will become transparent and will get quite a bit darker.

5.  While that's in the oven, you can do your cutout.  I printed off a silhouette of an owl from the internet.  You can use any cardboard or card stock to fit, but what I did was use the cardboard insert that comes with the frame and turned it over to cut.  No worrying about getting the right size, and the opposite side was black, which is perfect!

I marked out a 1-inch border all around, and then cut that out and cut out the owl.  I extended the branches all the way to the border.

 6.  Use duct tape to cover any areas that you might have cut into.  This will avoid light bleeding through when it's lit.

 7.  When the glass is ready, take it out and let it cool.  Then put the cutout into the frame (black side facing out), followed by the glass.  Here you might need a drop of glue or some double-sided tape to stick down the head/body part of the owl.  You don't need much.  Then over that you'll put wax paper.  Push down the tabs in the back of the frame, and duct tape to secure the wax paper.  (Doesn't matter what the back looks like here.)

8.  Get a single clip light.  Mine is from the dollar store, but I think it's a seasonal item, so if you can't find it there, you can get one from a hardware store or online for cheap.  I like this kind of light because you can just flip the switch to turn it off and on.

 8a.  Cut a small hole in the bottom of the cake pan near a short side and in the middle, and insert the light.  I wound up duct taping around the hole to reinforce it.  I only used one pan, but two might work better and give the whole thing more stability.

 8b.  Duct tape the pan to the frame with the light at the bottom, being sure to go all the way around with the tape.

 9.  Plug it in, light it up and enjoy!

 Like it?  Pin it / Share it, please!
Enjoy!


Sep 16, 2013

Skeleton Dish DIY

How's this for some fun Halloween DIY decor?  Get thee to the Dollar Store and make one yourself!


You'll need a plastic skeleton with joints you can take apart.  (Mine didn't actually come from the dollar store, but right after I bought it I saw some there that were similar.)  You also need a glass taper candle holder and a glass tealight holder.


Take the skeleton apart, and lay it out in a pattern you like on top of the dish.  Glue all that down with a strong adhesive (I like E6000).  I had to use a toothpick to get into some of the crevices to make sure everything would stick.


Put a line of glue around the top of the taper holder and glue the dish to it.  You can look down into the dish to help line it up.

This needs to get really dry.  You don't want this thing falling apart on you.  I let it dry for 48 hours.

Then I gave the whole thing a coat of cheap white spray paint to prime it.  Let that dry, then blast it with a coat of silver spray paint.  (I used Rust-oleum Bright Metallics.)  Let that dry fully.


With black acrylic, paint over the entire surface, working in a small area at a time.  Be sure to get into the cracks and spots where anything touches something else.  Then just take a paper towel or old rag and wipe it off before moving to the next section.  I almost skipped this step, but it gave it so much more dimension and realism, I'm glad I did it.  Do this over the entire thing, and let it dry.  Shouldn't take long.


I didn't add a sealer here.  Sealers tend to dull down metallic paints, and I figured it's not going to be handled all that much and would be fine.

Now it's ready to use to hold little trinkets like these spider rings, or you could fill it with dry black beans like I did and put in a tealight candle.  You'll notice I jazzed up my candle with a little flame washi tape, just for fun and contrast.

Give it a try, and enjoy!


I'm sharing this project at Halloween Spooktacular Linky Party @ Made in a Day


Sep 12, 2013

FAUX Burlap Display


I know by now everyone probably has a pretty good idea how to make these charming initialed burlap pieces.  But did you know you can get the same effect without buying supplies, measuring, cutting, painting, and matting?  You can!  

*This looks like a lot of steps, but it's just because I'm being VERY specific.  You should be able to knock this out quickly, even if you're not familiar with PicMonkey.

Here's how I got this look the easy way:

1.  Go to www.picmonkey.com.  If you don't have an account, create one now.  It's free and super easy.
2.  You want to start with a blank transparent page.  To do this, open "CREATE A COLLAGE" on the main page.  From the initial template, remove all but a single cell by clicking the "x" on each corner within the main body of the collage template.  Save this to your computer where you can readily find it.
3.  Now go to "EDIT A PHOTO." When it asks you to choose a photo, choose the blank page you just made.
4.  On the left is the drop-down menu where you choose your options.  First pick "BASIC EDITS."  (On mine, this is automatically on there when I go to this part.  If it's not, just click basic edits.)  From this option, choose "Resize."  Be sure the "Keep Proportions" option is NOT checked.  Then Change Size to 50 x 70.  Apply changes.
5.  Go to the "TEXTURES" option on the menu, and choose "WEAVE."  There's one on there that looks like burlap.  Choose that one.
8.  Now go to "TEXT" on the menu.  Select the font you like.  (Mine is Jellyka Delicious Cake, which is a premium option.)  At the top of the drop-down choose "ADD TEXT."   Type in your letter, enlarge it to the size you like, and drag it to the center of the photo.  Next to the text box will be another box with options.  Choose "BLEND MODES" and select "OVERLAY."  This is what gives it the look that it's actually been stamped onto the burlap and makes it look more realistic.
9.  Go back to "OVERLAYS" on the left-hand menu.  Go to "FLOURISHES" if you're a premium member or use another overlay such as "GARNISHES" for free.  Choose one you like.  Center and size it.  Choose "BLEND MODES" and "OVERLAY" for this part.  Then right click and pick "DUPLICATE OVERLAY" which will copy the same size and effect if you want one on top and one on bottom.
10.  Go to the menu and select "FRAMES."  I chose "MUSEUM MATTE." I didn't adjust any of the sizes on the frame, but you can make yours however you like it.
11.  Now save this to your computer.  

Get it printed at 5x7 inches, and frame it (mine is a Dollar Store frame!)  I used Walgreens to print the photo and ordered the matte finish, which you have to order by mail.  However, I have it framed behind glass, and it still looks good, so I feel like I should have just ordered the low-low cost, one-hour method, for the normal finish with minimal difference.  

I think it looks pretty good, even close up.  See?  That glare is from the glass in the frame, not from the photo paper.  You could take the glass out if you prefer that look.

Not so hard, right?  Give it a try!


Sep 9, 2013

Initial Letter Shrinky Charm

Here is another take on the good old Shrinky Dinks from your childhood!

I used white Shrinky Dinks for this project, but you could use any finish/color you like.

1.  Print off your initial in any font you like (I used Lucida Calligraphy.)  Make the letter three times the size you want your pendant to be, since they shrink down to about a third of their size.  I wanted it to be a little over an inch, so I went with almost 4 inches for the letter.

2.  I cut out a piece of the plastic that was just a bit larger than my letter.  You could tape the paper to the plastic, but I just held it together in my hands without a problem.  Then I cut out the letter from the paper and plastic simultaneously.

3.  Use a 1/8 " hole punch (if you have one) in an area that makes sense to place the jump ring.  (Shrinky Dinks instructions say that 1/8 " is the best size for jewelry making, but you could use a regular hole punch too.  It just won't be as snug on the jump ring.)

4.  Bake according to package directions.  

My tips are: 
*Place parchment paper under the shrinky to bake.  
*Don't panic!  It curls and then it uncurls.  It will be fine.  If it's not flat, press it down with a spatula as soon as it comes out of the oven.  
*These are pretty forgiving.  If it's just not flat after all that, you can put it back in the oven for a little bit more time.

5.  See how much they shrink?  If I were making this for myself, I probably would have stopped here and worn it as-is.  

However, I made this for my 12-year-old daughter who likes a bit more oomph.  I just used her favorite glitter nail polish to finish it.  I had to use three coats to get the look I wanted.  If polish clogs the opening to the hole, just use a toothpick to clear it out.

6.  When that's all dry, just add a jump ring and string it onto a chain.  That's it!

Hope you'll give this a try.  It was a very easy project, and my daughter is thrilled with her new necklace!


Sep 4, 2013

How to Save Money on Spices


Call me a slow learner, but I just realized that our local grocery store has a bulk spice section!  Actually, I don't think it's that I'm such a slow learner, but that I usually find myself zooming through the store with my list and several children in tow and I have never taken the time to really get to know my store!

So perhaps that is Tip #1 for you today:  Take time by yourself to stroll slowly through your store, noticing what exactly they offer, how much it costs, and where it is located. Not only did I discover the bulk spice section, but I realized that our store has a fairly impressive section of health/natural foods and supplements.  So good to know!

Which brings us to my main tip for you today.  This week I needed to buy poppy seeds.  They come in a little bottle like this in the regular spice aisle:

In case you can't see it, that is 1.25 ounces for $3.18, which works out to $2.54 per ounce, or a whopping $40.64 per pound!  Wow, those poppy seeds are precious!

Come with me to the far side of the store where we find the bulk spices.  As you can see, the array is extensive.


I didn't know exactly how much poppy seed I would need, so I just scooped a bit into the little plastic bags provided, marked the PLU number on it, and weighed it.

Here is how I made out:
That is .04 pounds of poppy seed, which works out to .64 ounces.  It should be plenty for my recipe.  In any case, you can see the price per pound on the label:  $7.99 per pound! Hmmm, seems like a MUCH better deal than getting the tiny bottle from McCormick!  I got just the right amount and for only 32 cents!

I think this is especially a great way to go if you only need a little bit of a particular spice.  Don't we all have bottles of spices in our pantries that we used once or twice, and now they've been there for years?!

(On that note, they say once a jar of ground spice has been opened, it should be used within 6 to 9 months in order to preserve maximum flavor.  Whole spices will keep much longer.)

What other things do you buy in bulk?  I wish our local store had a better selection of grains in bulk.  Maybe I'll have to request that.  Share with us your tips for saving money at the grocery store!