Pages

Showing posts with label Gifts. Show all posts

Oct 7, 2013

Pumpkin Candy Display

To make this sweet candy display, I started by making a little clay pumpkin.  Just roll a ball of orange clay, then flatten it slightly.  Use a string or dental floss to form ridges, leaving the middle part free of ridges so you can paint the face easier.  I then pressed the eraser end of a pencil into the clay for the eye sockets (not shown).  
I twisted up a piece of wire and inserted it for the stem.  Then I cured the pumpkin in the oven according to directions on the package (I used Sculpey III.)
After it cooled, I used a white paint pen and a black Micron pen to add features.

I finished it off by painting the stem green and giving the whole thing a glossy finish with spray gloss lacquer after it dried.  After letting the gloss dry, I hot glued the pumpkin to a felt flower (instructions for flower here). 
Then I put a ribbon around a plain clear plastic cup (you could also use a glass jar), and glued the flower to the ribbon, being careful not to melt the cup.  I added candy corn and these cute swirly lollipops from the dollar store.  They are spin pops and had a label in the center that I couldn't remove, so I just cut paper that coordinated with the flower to cover them up. 
Easy and fun!


Sep 30, 2013

Make Felt Flowers


Here's a quick and easy way to make felt flowers for decorating and embellishing.  This tutorial shows two different styles.  

You'll need:

1 sheet of felt (or more if you're doing different colors)
Felt glue and/or hot glue
Scissors
Card stock in coordinating colors

We'll start with the orange loopy flower.

Fold one edge of felt over lengthwise.  Cut out this piece, but don't cut along the fold.

Using felt glue or hot glue, glue the unfolded edge to itself.
Make evenly-speced cuts all along the length of the felt, through the fold but not all the way to the glued edge.

Cut out a circle of felt or card stock.  Put your choice of adhesive all over the circle.  Starting with one edge of felt, lay it down along the edge of the circle, following the edge of the circle.  When you have gone all the way around, continue winding toward the middle and sticking it down.


Using another piece of card stock, apply adhesive to the entire surface (here I used adhesive tape on a shape I cut out with a puncher, but you can use whatever you like).  

Press that into the middle of the flower and ta-daaa!

For the black flower, it's the same procedure, except I cut down the fold after gluing the edges together, and I made the cuts more closely spaced.


"Fluff up" the petals, and you're done....

...UNLESS you want to take it up a notch and add another embellishment like this.  Click here to see how I made the skull, or click here to see how I used this on a wreath.

Enjoy!


Sep 12, 2013

FAUX Burlap Display


I know by now everyone probably has a pretty good idea how to make these charming initialed burlap pieces.  But did you know you can get the same effect without buying supplies, measuring, cutting, painting, and matting?  You can!  

*This looks like a lot of steps, but it's just because I'm being VERY specific.  You should be able to knock this out quickly, even if you're not familiar with PicMonkey.

Here's how I got this look the easy way:

1.  Go to www.picmonkey.com.  If you don't have an account, create one now.  It's free and super easy.
2.  You want to start with a blank transparent page.  To do this, open "CREATE A COLLAGE" on the main page.  From the initial template, remove all but a single cell by clicking the "x" on each corner within the main body of the collage template.  Save this to your computer where you can readily find it.
3.  Now go to "EDIT A PHOTO." When it asks you to choose a photo, choose the blank page you just made.
4.  On the left is the drop-down menu where you choose your options.  First pick "BASIC EDITS."  (On mine, this is automatically on there when I go to this part.  If it's not, just click basic edits.)  From this option, choose "Resize."  Be sure the "Keep Proportions" option is NOT checked.  Then Change Size to 50 x 70.  Apply changes.
5.  Go to the "TEXTURES" option on the menu, and choose "WEAVE."  There's one on there that looks like burlap.  Choose that one.
8.  Now go to "TEXT" on the menu.  Select the font you like.  (Mine is Jellyka Delicious Cake, which is a premium option.)  At the top of the drop-down choose "ADD TEXT."   Type in your letter, enlarge it to the size you like, and drag it to the center of the photo.  Next to the text box will be another box with options.  Choose "BLEND MODES" and select "OVERLAY."  This is what gives it the look that it's actually been stamped onto the burlap and makes it look more realistic.
9.  Go back to "OVERLAYS" on the left-hand menu.  Go to "FLOURISHES" if you're a premium member or use another overlay such as "GARNISHES" for free.  Choose one you like.  Center and size it.  Choose "BLEND MODES" and "OVERLAY" for this part.  Then right click and pick "DUPLICATE OVERLAY" which will copy the same size and effect if you want one on top and one on bottom.
10.  Go to the menu and select "FRAMES."  I chose "MUSEUM MATTE." I didn't adjust any of the sizes on the frame, but you can make yours however you like it.
11.  Now save this to your computer.  

Get it printed at 5x7 inches, and frame it (mine is a Dollar Store frame!)  I used Walgreens to print the photo and ordered the matte finish, which you have to order by mail.  However, I have it framed behind glass, and it still looks good, so I feel like I should have just ordered the low-low cost, one-hour method, for the normal finish with minimal difference.  

I think it looks pretty good, even close up.  See?  That glare is from the glass in the frame, not from the photo paper.  You could take the glass out if you prefer that look.

Not so hard, right?  Give it a try!


Sep 9, 2013

Initial Letter Shrinky Charm

Here is another take on the good old Shrinky Dinks from your childhood!

I used white Shrinky Dinks for this project, but you could use any finish/color you like.

1.  Print off your initial in any font you like (I used Lucida Calligraphy.)  Make the letter three times the size you want your pendant to be, since they shrink down to about a third of their size.  I wanted it to be a little over an inch, so I went with almost 4 inches for the letter.

2.  I cut out a piece of the plastic that was just a bit larger than my letter.  You could tape the paper to the plastic, but I just held it together in my hands without a problem.  Then I cut out the letter from the paper and plastic simultaneously.

3.  Use a 1/8 " hole punch (if you have one) in an area that makes sense to place the jump ring.  (Shrinky Dinks instructions say that 1/8 " is the best size for jewelry making, but you could use a regular hole punch too.  It just won't be as snug on the jump ring.)

4.  Bake according to package directions.  

My tips are: 
*Place parchment paper under the shrinky to bake.  
*Don't panic!  It curls and then it uncurls.  It will be fine.  If it's not flat, press it down with a spatula as soon as it comes out of the oven.  
*These are pretty forgiving.  If it's just not flat after all that, you can put it back in the oven for a little bit more time.

5.  See how much they shrink?  If I were making this for myself, I probably would have stopped here and worn it as-is.  

However, I made this for my 12-year-old daughter who likes a bit more oomph.  I just used her favorite glitter nail polish to finish it.  I had to use three coats to get the look I wanted.  If polish clogs the opening to the hole, just use a toothpick to clear it out.

6.  When that's all dry, just add a jump ring and string it onto a chain.  That's it!

Hope you'll give this a try.  It was a very easy project, and my daughter is thrilled with her new necklace!


Sep 2, 2013

No-Sew T-Shirt Purse

I've seen lots of people making bags from T-shirts and wanted to try it, but I don't sew.  Then I remembered a few years ago, my daughter was a Girl Scout, and they made something using a similar no-sew technique.  Time to give it a try!

I started with a plain black T-shirt.  This was a size Adult Medium, and I wouldn't recommend using anything smaller than that.  FYI - I didn't have a shirt that I wanted to use, so I got this shirt at the dollar store.  Score!

I know it kind of looks navy in this pic, but I promise it's black.  Lay the shirt on a flat surface.

Using scissors or a rotary cutter, cut off the neck, sleeves, and bottom hem.

Next cut slits along the bottom edge.  Mine were about 3 inches long and about 1/2 inch wide.  I used the ruler as a guide, but didn't make it exact.

Next, pull gently on each strip to keep them from fraying later.  Something magic happens when you do this, and they transform like this:
Then tie the strips to each other, lining up the front strip with the back.  Make tight knots so the purse will hold whatever you put inside it later.

Next you'll make the neckline deeper if needed (mine needed it), and you'll cut across the top shoulder seams on each side, and remove the part that's stitched as well.
Take the right front shoulder and tie it to the left front shoulder.  Repeat with the back.  Pull those knots tight!
That's all there is to making the purse itself, but I wanted to jazz mine up a little, so I made some felt flowers to embellish it.

There are tons of tutorials for this, but it's really easy.  Just cut a circle from felt.  It doesn't have to be perfect or even or anything.  Just make it circle-like.  Then spiral cut along the center like this:
Then starting with the center, roll up the sides and glue along the way.  Anybody know a secret to gluing felt?  I tried several different adhesives and wound up going with plain hot glue.  I did another one where I made more of a scallop shape and did the same process for a different kind of flower.
After I got the flowers I wanted, I just simply hot glued them to a corner of the bag.
Here is a BIG tip for making the bag hold its shape.  I just put an ordinary manilla file folder inside the bag.  No need to fasten it unless you want to.

That's it!  Enjoy!


Aug 9, 2013

Personalize your spiral notebook

Last week, I posted this post listing some easy and creative ways to use some of your extra school supplies. 

This week I'm showing you the Personalized Spiral Notebook


Supplies needed:
spiral notebook
pipe cleaners
spray adhesive
scissors
wax paper

First lay out your wax paper and place your spiral in the middle.  Using whatever pattern or design you wish, start laying out your pipe cleaners in order.  The pipe cleaners will probably be too long, so you have 2 options:  cut them before you glue them down or lay them all down and cut them all after the glue dries.

Then, using a piece of cardboard or plastic as a barrier, spray 1-2 inches of your spiral, starting on the left.  As quickly as possible, place the pipe cleaners on the sticky surface until you've covered all of the adhesive.  Then using a piece of plastic or cardboard as a protective barrier, spray the next 1-2 inches and lay the pipe cleaners.  Repeat the process until you've covered the entire cover.  Allow the glue to dry completely before you cut the excess or before you use it.


I'm going back to school this fall, and our school colors are blue and gold.  I thought this would be a nice, personalized gift for another teacher or a student.

Come back next Friday for a new super easy school supply craft idea.


Aug 5, 2013

Yearly Project for Graduation Gift


Ashlee at Two Naps by Noon came up with a great idea for a long-term project that will be a huge hit with your child when he/she graduates.  

Write a letter to your child each year at a specific time, including interesting facts about them from the previous year, and include some cash.  Then, however many envelopes you have, you can give them one per day leading up to graduation.  I think I'll do mine at the beginning or end of each school year and possibly give to them in the days leading up to the time they move away for college.  

They will have lots of "love letters" to send them off and a nice little nest egg to get started.

I just wish I'd known about this when my kids were younger!

Jul 15, 2013

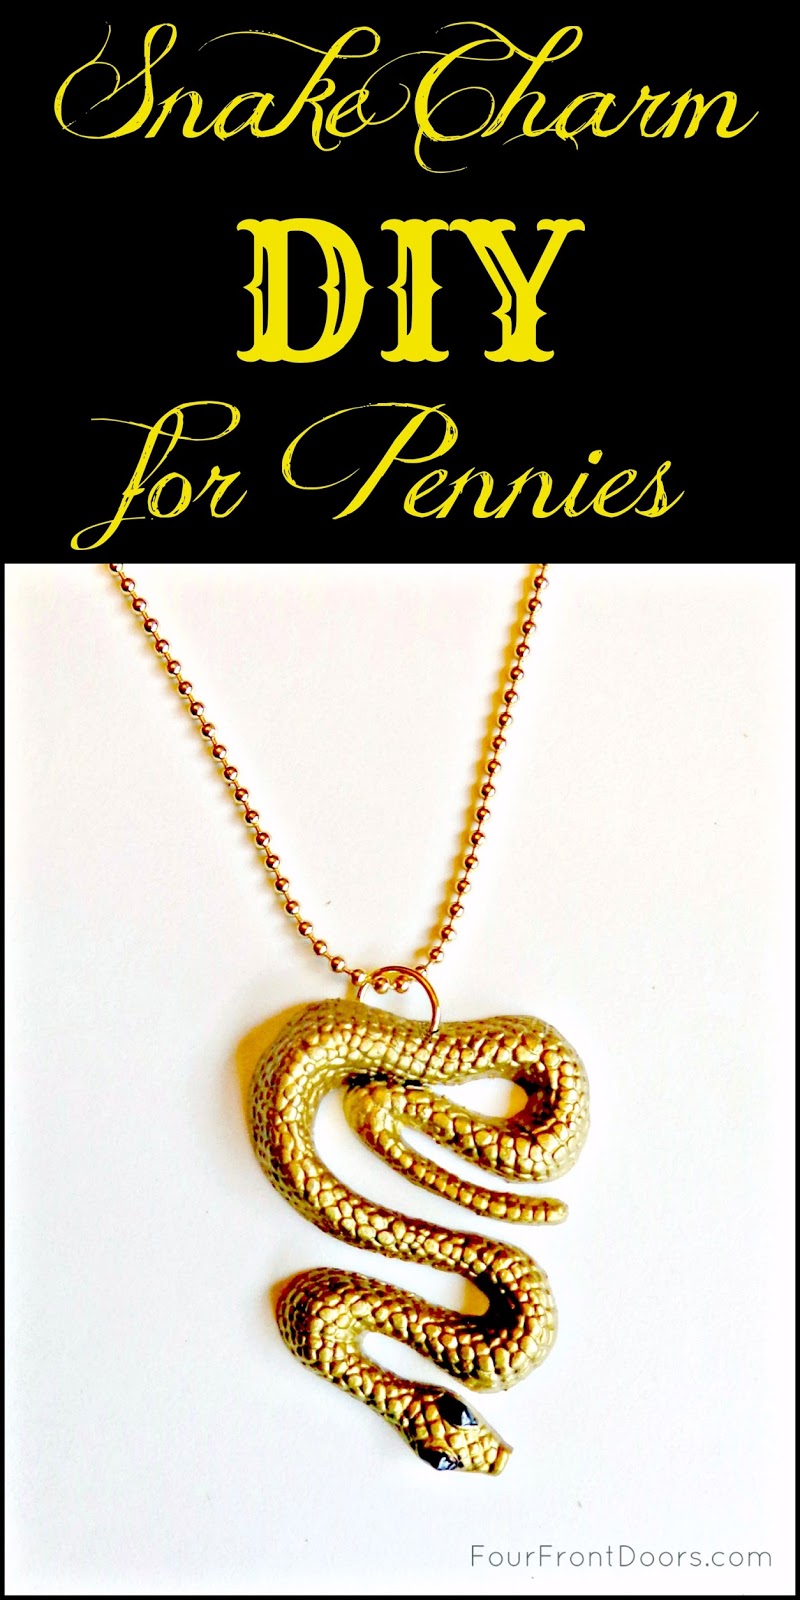
Snake Pendant DIY

This charming snake pendant (see what I did there?) costs only pennies to make!

I had these little party favors from the dollar store, and I selected the snake.
Then I cut off the little tongue, and I made a small hole through the middle of part of the tail.  (I used a 1/16" hole punch.)
Next, I spray painted it gold and let it dry.
Then I used an Ultra-Fine Point black Sharpie to fill in the eye area.  After that, I used metallic black puff paint in the center of each eye for more dimension.  Let that dry.

At this point, I also decided it needed a bit more "gold" so I used a little Gold Leaf Rub'n Buff.  Spray on a clear sealant and let it dry.
Add a jump ring to the hole you made earlier, slide it onto a chain, and enjoy!