Here is another take on the good old Shrinky Dinks from your childhood!
I used white Shrinky Dinks for this project, but you could use any finish/color you like.
1. Print off your initial in any font you like (I used Lucida Calligraphy.) Make the letter three times the size you want your pendant to be, since they shrink down to about a third of their size. I wanted it to be a little over an inch, so I went with almost 4 inches for the letter.
2. I cut out a piece of the plastic that was just a bit larger than my letter. You could tape the paper to the plastic, but I just held it together in my hands without a problem. Then I cut out the letter from the paper and plastic simultaneously.
3. Use a 1/8 " hole punch (if you have one) in an area that makes sense to place the jump ring. (Shrinky Dinks instructions say that 1/8 " is the best size for jewelry making, but you could use a regular hole punch too. It just won't be as snug on the jump ring.)
4. Bake according to package directions.
My tips are:
*Place parchment paper under the shrinky to bake.
*Don't panic! It curls and then it uncurls. It will be fine. If it's not flat, press it down with a spatula as soon as it comes out of the oven.
*These are pretty forgiving. If it's just not flat after all that, you can put it back in the oven for a little bit more time.
5. See how much they shrink? If I were making this for myself, I probably would have stopped here and worn it as-is.
However, I made this for my 12-year-old daughter who likes a bit more oomph. I just used her favorite glitter nail polish to finish it. I had to use three coats to get the look I wanted. If polish clogs the opening to the hole, just use a toothpick to clear it out.
6. When that's all dry, just add a jump ring and string it onto a chain. That's it!
Hope you'll give this a try. It was a very easy project, and my daughter is thrilled with her new necklace!
Showing posts with label Style. Show all posts
Sep 9, 2013
Sep 2, 2013
No-Sew T-Shirt Purse
I've seen lots of people making bags from T-shirts and wanted to try it, but I don't sew. Then I remembered a few years ago, my daughter was a Girl Scout, and they made something using a similar no-sew technique. Time to give it a try!
I started with a plain black T-shirt. This was a size Adult Medium, and I wouldn't recommend using anything smaller than that. FYI - I didn't have a shirt that I wanted to use, so I got this shirt at the dollar store. Score!
I know it kind of looks navy in this pic, but I promise it's black. Lay the shirt on a flat surface.
Using scissors or a rotary cutter, cut off the neck, sleeves, and bottom hem.
Next cut slits along the bottom edge. Mine were about 3 inches long and about 1/2 inch wide. I used the ruler as a guide, but didn't make it exact.
Next, pull gently on each strip to keep them from fraying later. Something magic happens when you do this, and they transform like this:
Then tie the strips to each other, lining up the front strip with the back. Make tight knots so the purse will hold whatever you put inside it later.
Next you'll make the neckline deeper if needed (mine needed it), and you'll cut across the top shoulder seams on each side, and remove the part that's stitched as well.
Take the right front shoulder and tie it to the left front shoulder. Repeat with the back. Pull those knots tight!
That's all there is to making the purse itself, but I wanted to jazz mine up a little, so I made some felt flowers to embellish it.
There are tons of tutorials for this, but it's really easy. Just cut a circle from felt. It doesn't have to be perfect or even or anything. Just make it circle-like. Then spiral cut along the center like this:
Then starting with the center, roll up the sides and glue along the way. Anybody know a secret to gluing felt? I tried several different adhesives and wound up going with plain hot glue. I did another one where I made more of a scallop shape and did the same process for a different kind of flower.
After I got the flowers I wanted, I just simply hot glued them to a corner of the bag.
Here is a BIG tip for making the bag hold its shape. I just put an ordinary manilla file folder inside the bag. No need to fasten it unless you want to.
That's it! Enjoy!
Jul 31, 2013
Whatcha Wearin' Wednesday
Today I'm posting a little outfit that is good for kickin' around town but also looks nice enough to go to a casual lunch or a meeting at the kids' school.
Again, please excuse my squinty eyes! I promise, I will get this style photo thing down!
So here we have a simple navy and white striped t-shirt with 3/4 length sleeves, paired with khaki bermuda shorts. The jewelry is mostly gold-tone, as are the flip-flops.
WHAT I LOVE ABOUT THIS OUTFIT:
* The stripes on the t-shirt seem nautical and summery to me. And though the sleeves are a bit long for summer in Texas, they push up easily!
* The necklace is a good weight; it hangs nicely and goes with so many things.
* Navy, khaki and white - classic colors
* I love using gold shoes as a neutral. So much more fun than taupe or beige. Gold is a go-to for me. For cooler weather, I have a pair of gold flats that go with everything!
THE DETAILS:
t-shirt - Uniqlo
shorts - Old Navy
necklace - The Limited from waaaay back - I'm talking high school!
earrings - gift from parents
bracelet - Macy's
flip-flops - American Eagle by way of TJ Maxx
I'm linking up this week with The Pleated Poppy and Random Wednesday at Because Shanna Said So.
Again, please excuse my squinty eyes! I promise, I will get this style photo thing down!
So here we have a simple navy and white striped t-shirt with 3/4 length sleeves, paired with khaki bermuda shorts. The jewelry is mostly gold-tone, as are the flip-flops.
WHAT I LOVE ABOUT THIS OUTFIT:
* The stripes on the t-shirt seem nautical and summery to me. And though the sleeves are a bit long for summer in Texas, they push up easily!
* The necklace is a good weight; it hangs nicely and goes with so many things.
* Navy, khaki and white - classic colors
* I love using gold shoes as a neutral. So much more fun than taupe or beige. Gold is a go-to for me. For cooler weather, I have a pair of gold flats that go with everything!
THE DETAILS:
t-shirt - Uniqlo
shorts - Old Navy
necklace - The Limited from waaaay back - I'm talking high school!
earrings - gift from parents
bracelet - Macy's
flip-flops - American Eagle by way of TJ Maxx
I'm linking up this week with The Pleated Poppy and Random Wednesday at Because Shanna Said So.
Jul 24, 2013
Whatcha Wearin' Wednesday
Whatcha Wearin' Wednesday is back! It's been a while, but I thought I would post an outfit that I've worn recently.
First, I would like to ask you to ignore my squinty eyes in this photo! It was a tad sunny, but otherwise a good time for photo-taking. So there it is!
I love this yellow dress that I found at Old Navy on clearance. It has a circular eyelet pattern on it and a simple zip up the back.
Here I wore a skinny metallic pink belt to try to define the waist a bit. The turquoise wedges are really fun and turquoise is a go-to color for me in the summertime. It goes with almost everything!

The necklace was made by me several years ago in my making-jewelry phase. This is one of my favorites, and I've gotten a lot of mileage from it!
I didn't wear earrings or a bracelet, as the bright colors and the necklace are enough for me.
WHAT I LOVE ABOUT THIS OUTFIT:
* Color! I am a color addict and I love putting several bright colors together.
* The ease of the dress. It is a breeze to zip and go. I love dresses for this reason.
* Wedges make me feel tall. And powerful.
THE DETAILS:
Dress - Old Navy
Shoes - TJ Maxx
Belt - Target
Necklace - made by me
I'm linking today with The Pleated Poppy and Random Wednesday.
First, I would like to ask you to ignore my squinty eyes in this photo! It was a tad sunny, but otherwise a good time for photo-taking. So there it is!
I love this yellow dress that I found at Old Navy on clearance. It has a circular eyelet pattern on it and a simple zip up the back.
Here I wore a skinny metallic pink belt to try to define the waist a bit. The turquoise wedges are really fun and turquoise is a go-to color for me in the summertime. It goes with almost everything!
The necklace was made by me several years ago in my making-jewelry phase. This is one of my favorites, and I've gotten a lot of mileage from it!
WHAT I LOVE ABOUT THIS OUTFIT:
* Color! I am a color addict and I love putting several bright colors together.
* The ease of the dress. It is a breeze to zip and go. I love dresses for this reason.
* Wedges make me feel tall. And powerful.
THE DETAILS:
Dress - Old Navy
Shoes - TJ Maxx
Belt - Target
Necklace - made by me
I'm linking today with The Pleated Poppy and Random Wednesday.
Jul 22, 2013
Manicure Tips
I've used many brands of polish, in many price ranges. My favorites are OPI, Essie, and Deborah Lippmann, but I've also found some drugstore brands I like, such as L'Oreal and Milani. Most will work as long as you follow these tips.
Store polish in a cool dark place, and just go through your stash and toss out any old and goopy polishes. Don't try to save them with polish remover. Just say goodbye and move on.
I'm not a professional by any means, but these are my personal tips that have worked for me.
1. After removing polish, file nails in one direction only. Do not file across, as this can give a rough edge to nail tips.
2. Do NOT soak your nails right before or after a manicure. You don't want added water here.
3. (This is my #1 tip:) Buff nails GENTLY and lightly to remove ridges and give a smooth surface. Don't do it too much or you could thin the nail. This step has made a HUGE difference in the staying power of my polish.
4. Wipe nails with acetone polish remover to prevent residue like water, lotion, or natural oils and to remove any particles left from filing and buffing.
5. Start with a sticky base coat.
6. Use thin coats of polish, and let it dry between coats.
7. Be sure to cover the free edge of the nail with polish to "seal" the manicure.
8. Give nails plenty of time to "cure," even if they seem dry.
9. Use a top coat, and try to do it every day.
10. Use cuticle oil.
This might look like a lot of steps, but once you do it a few times, it really doesn't take long at all. The best part is that your manicure can last much longer with very little chipping in between, so it's worth it. Hope this helps your manicure look pretty longer!
Jul 15, 2013
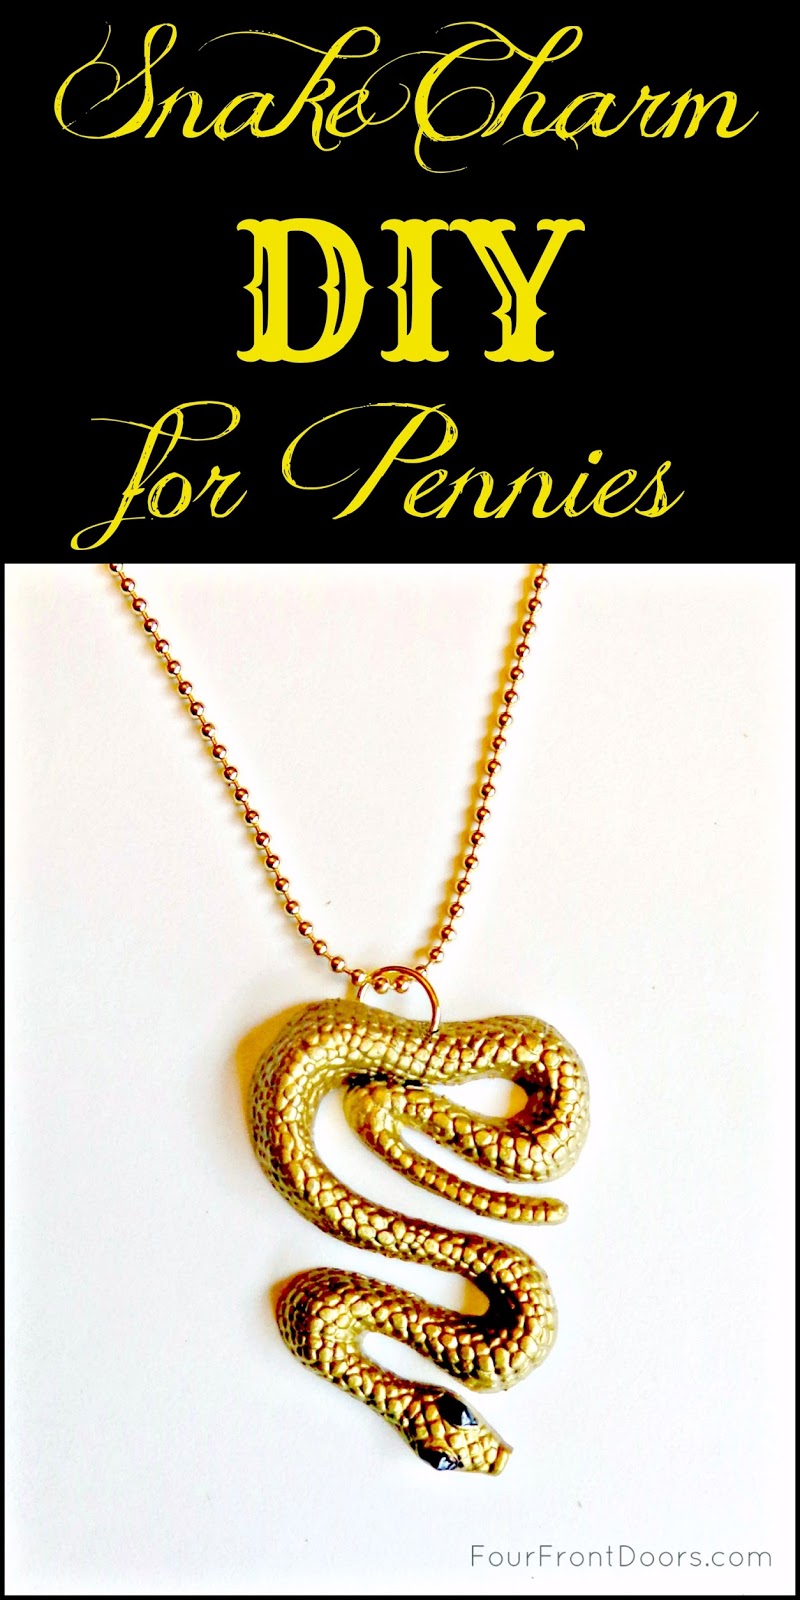
Snake Pendant DIY
This charming snake pendant (see what I did there?) costs only pennies to make!
I had these little party favors from the dollar store, and I selected the snake.
Then I cut off the little tongue, and I made a small hole through the middle of part of the tail. (I used a 1/16" hole punch.)
Next, I spray painted it gold and let it dry.
At this point, I also decided it needed a bit more "gold" so I used a little Gold Leaf Rub'n Buff. Spray on a clear sealant and let it dry.
Then I cut off the little tongue, and I made a small hole through the middle of part of the tail. (I used a 1/16" hole punch.)
Next, I spray painted it gold and let it dry.
Then I used an Ultra-Fine Point black Sharpie to fill in the eye area. After that, I used metallic black puff paint in the center of each eye for more dimension. Let that dry.
At this point, I also decided it needed a bit more "gold" so I used a little Gold Leaf Rub'n Buff. Spray on a clear sealant and let it dry.
Add a jump ring to the hole you made earlier, slide it onto a chain, and enjoy!
Jun 26, 2013
Flea Market Find
A few weekends ago my husband and I spent a Saturday at various flea markets in our area. In one of the dumpiest ones, I made this great find!
Now, maybe you don't as excited about old stuff as I do, but I wanted to show you this great cake carrier. It looks like it's from the 70s.
Let me take you on a little tour:
| Here are all the parts separately. Can you tell what goes where?! I'm telling you, this thing is full of hidden storage spaces! |
| Looky here! In the bottom section, under the cake plate, is a little space where you could store/transport cookies or brownies or anything else low profile. |
| Then you put your cake on the cake plate and cover it with the tall flowered section. |
| Then you add the lid. But wait! There is more room for cookies or brownies or any other kind of treat right there under the lid! I'm telling you, this thing can house a dessert extravaganza! |
| Then you pick it up by the trusty little handle and off you go! I can't wait to use it! |
Jun 24, 2013
Glue Gun Glam!
This is a fun way to use items you probably already have on hand for inexpensive, unique and pretty earrings!
Would you believe the main material for this project is...Drops from a glue gun!?
Supplies:
Do this:
I started by printing off some circles in different sizes, and wound up using ones that were about an inch in diameter.
Place the page of circles underneath the silicon mat.
Using the circles as a guide, place dots of glue on the mat, making sure none of them touch!
After the forms cool completely, spray paint front and backs with gold paint. To make this easier and less messy, I strung my forms on a piece of twine and tied it to either side of a cardboard box. Let paint dry completely.
Get your acrylic paints together. I used a metallic gold, pineapple yellow, a dusty green, peacock blue, navy, and dark purple.
Begin by choosing three colors (I used yellow, peacock, navy) and use one of each color to paint the sections on, then middle, then bottom. You'll probably need two coats.
Then just dab on colors in a close shade with a tiny paintbrush, then dab off with paper towel. I dabbed at it until I got a look I liked. I also swirled similar colors together. When it was a little dryer, I used the metallic gold and repeated the brushing-and-dabbing process. Last, I used a tiny bit of copper colored Rub-n-Buff around the very edges, but you could do without that if you want.
After this dried completely (didn't take very long), I liked the look, but it was a bit dull, so I used a glossy lacquer spray to make it shiny. I did three coats, with just a little drying time in between.
Next I took a jump ring and attached it to the earring finding.
Using E-6000, I simply glued the jump ring to the back of the form, making sure the hook faced the correct direction and didn't get glued.
Once the adhesive dries completely, they're ready to wear and show off!
By the way, I saw similar earrings for $420, but these were SUPER CHEAP!! The only supplies I had to buy were the jump rings and the earring findings.
Jump rings - $1.39 for a pack of 12 = 11.5 cents each. I used two, for 23 cents.
Earring findings - $1.39 for a pack of 8 = 17 cents each. I used two, for just under 35 cents.
I already had everything else and used minimal amounts of each, so basically these earrings cost me less than 60 cents for the pair!
Would you believe the main material for this project is...Drops from a glue gun!?
Supplies:
- Printer with paper and ink
- Hot glue gun and glue sticks
- Silicone or non-stick heat-safe mat
- Gold spray paint
- Acrylic paint in various colors of your choice
- Gloss finish lacquer
- Jump Rings (2)
- Earring findings (2)
- Strong adhesive (like E-6000)
Do this:
I started by printing off some circles in different sizes, and wound up using ones that were about an inch in diameter.
Place the page of circles underneath the silicon mat.

Using the circles as a guide, place dots of glue on the mat, making sure none of them touch!

IMPORTANT: Let them cool before you join the dots with more dots. Otherwise, it will all just glob together.

After the forms cool completely, spray paint front and backs with gold paint. To make this easier and less messy, I strung my forms on a piece of twine and tied it to either side of a cardboard box. Let paint dry completely.


Begin by choosing three colors (I used yellow, peacock, navy) and use one of each color to paint the sections on, then middle, then bottom. You'll probably need two coats.
Then just dab on colors in a close shade with a tiny paintbrush, then dab off with paper towel. I dabbed at it until I got a look I liked. I also swirled similar colors together. When it was a little dryer, I used the metallic gold and repeated the brushing-and-dabbing process. Last, I used a tiny bit of copper colored Rub-n-Buff around the very edges, but you could do without that if you want.
After this dried completely (didn't take very long), I liked the look, but it was a bit dull, so I used a glossy lacquer spray to make it shiny. I did three coats, with just a little drying time in between.

Next I took a jump ring and attached it to the earring finding.

Using E-6000, I simply glued the jump ring to the back of the form, making sure the hook faced the correct direction and didn't get glued.

Once the adhesive dries completely, they're ready to wear and show off!

By the way, I saw similar earrings for $420, but these were SUPER CHEAP!! The only supplies I had to buy were the jump rings and the earring findings.
Jump rings - $1.39 for a pack of 12 = 11.5 cents each. I used two, for 23 cents.
Earring findings - $1.39 for a pack of 8 = 17 cents each. I used two, for just under 35 cents.
I already had everything else and used minimal amounts of each, so basically these earrings cost me less than 60 cents for the pair!
Subscribe to:
Posts (Atom)