Pages

Showing posts with label Recipes. Show all posts

Oct 23, 2013

Easy Homemade Caramel Sauce


I've been making this cake from Martha Stewart for the last 6 months or so, pretty much every time I need a very yummy and fairly uncomplicated dessert for something.  

Now that it's officially fall, there is no better time than now for this cake!  But even better and easier and more versatile is the CARAMEL SAUCE that goes with this cake!

I made the cake last Sunday for a church lunch, and Monday morning I found myself with a little cup of leftover caramel sauce.  It was just sitting there, on the kitchen counter, calling my name.  At least I think it was calling my name. It sure sounded like it to me.

Anyway, the next thing I knew, I had cut a juicy apple into quarters and was dipping each slice into the rich, buttery caramel sauce. And yes, I did double dip.  I knew there would be no leftovers today.

It seemed only fitting that I leave you with a few easy peasy recipes so that YOU can make your own caramel sauce.  It's delicious!  In fact, my son informed me last night that I need to make more so that he can just eat it with a spoon.  Not a bad idea.

Here is the easy recipe from Martha that goes with the apple spice cake.   You can find a very similar one on her website here.  

You will need this cast of characters:


1 cup brown sugar
1 stick of butter (Martha says unsalted, but I say whatevs)
1/4 cup evaporated milk
1 teaspoon vanilla extract
a pinch of salt

Combine all ingredients in a small to medium saucepan (heavy-bottomed is nice to guard against burning).  Cook over medium heat, stirring continually, until it's the desired consistency.

See how easy that is?!?

If you find yourself without evaporated milk, no worries.  You can use heavy cream or even regular milk. Poke around online and you'll find all kinds of different recipes, some very complicated and scary and others not. I like this one because it is very simple, fool-proof, really.


What else can you do with caramel sauce?  Here are a few ideas:  eat it with a spoon or drizzle it over any number of things, including ice cream, baked pears or apples, or baked goods.  You could also put it in a cute jar and give it as a gift!

Now get to it!  A delicious snack awaits!


Oct 9, 2013

Delicious No-Knead Artisan Bread


Last week was my turn to host book club, and I wanted to make a delicious meal for my "lady friends" (that's what my children call my book club friends).  I was making one of our favorite soups and a great salad; seemed to me like a nice, crusty bread would be perfect with that!

So I did what people do nowadays; I googled "artisan bread recipe".

I found a recipe here that seemed like a good one, and pretty easy. I made it that afternoon and got rave reviews at book club that night!

So here I will share with you the recipe that belongs to Natasha at Natasha's Kitchen.  Even if you're not really a bread maker, or a baker, you can do this!  It's only got four ingredients, and seems to be pretty much fool-proof!  I hope you give it a try.

Here's what you do (with apologies for the grainy photos; it was early this morning and I just couldn't get enough light!):

First, add 1 1/2 cups of very warm water to a large bowl. Sprinkle in 1/2 tablespoon of salt and 3/4 tablespoon of yeast. 

Stir and let it sit for a minute or two.  It will look like this.

Gently stir it again, and then measure out three cups of regular flour and add to the liquid mixture. 


Quick tip:  do you know the correct method for measuring out flour in baking?  

Use a spoon to lightly fill the cup measure.  Then use the straight side of a table knife to level the flour.  You never want to pack down the flour when you're baking.  Just in case you didn't already know!

Using a wooden spoon, stir the dough until it forms a rough ball, as shown.  

Cover the bowl with a loose-fitting lid or with plastic wrap. Allow the dough to rise for 2 hours.

Quick tip:  Yeast rises better in a warm-ish environment.  If my house is drafty or cool on a baking day, I will turn my oven to a low temperature, and sit the dough bowl on the oven to rise.  It gives it just enough warmth to rise nicely without taking too long!

Here is the dough after rising 2 hours.

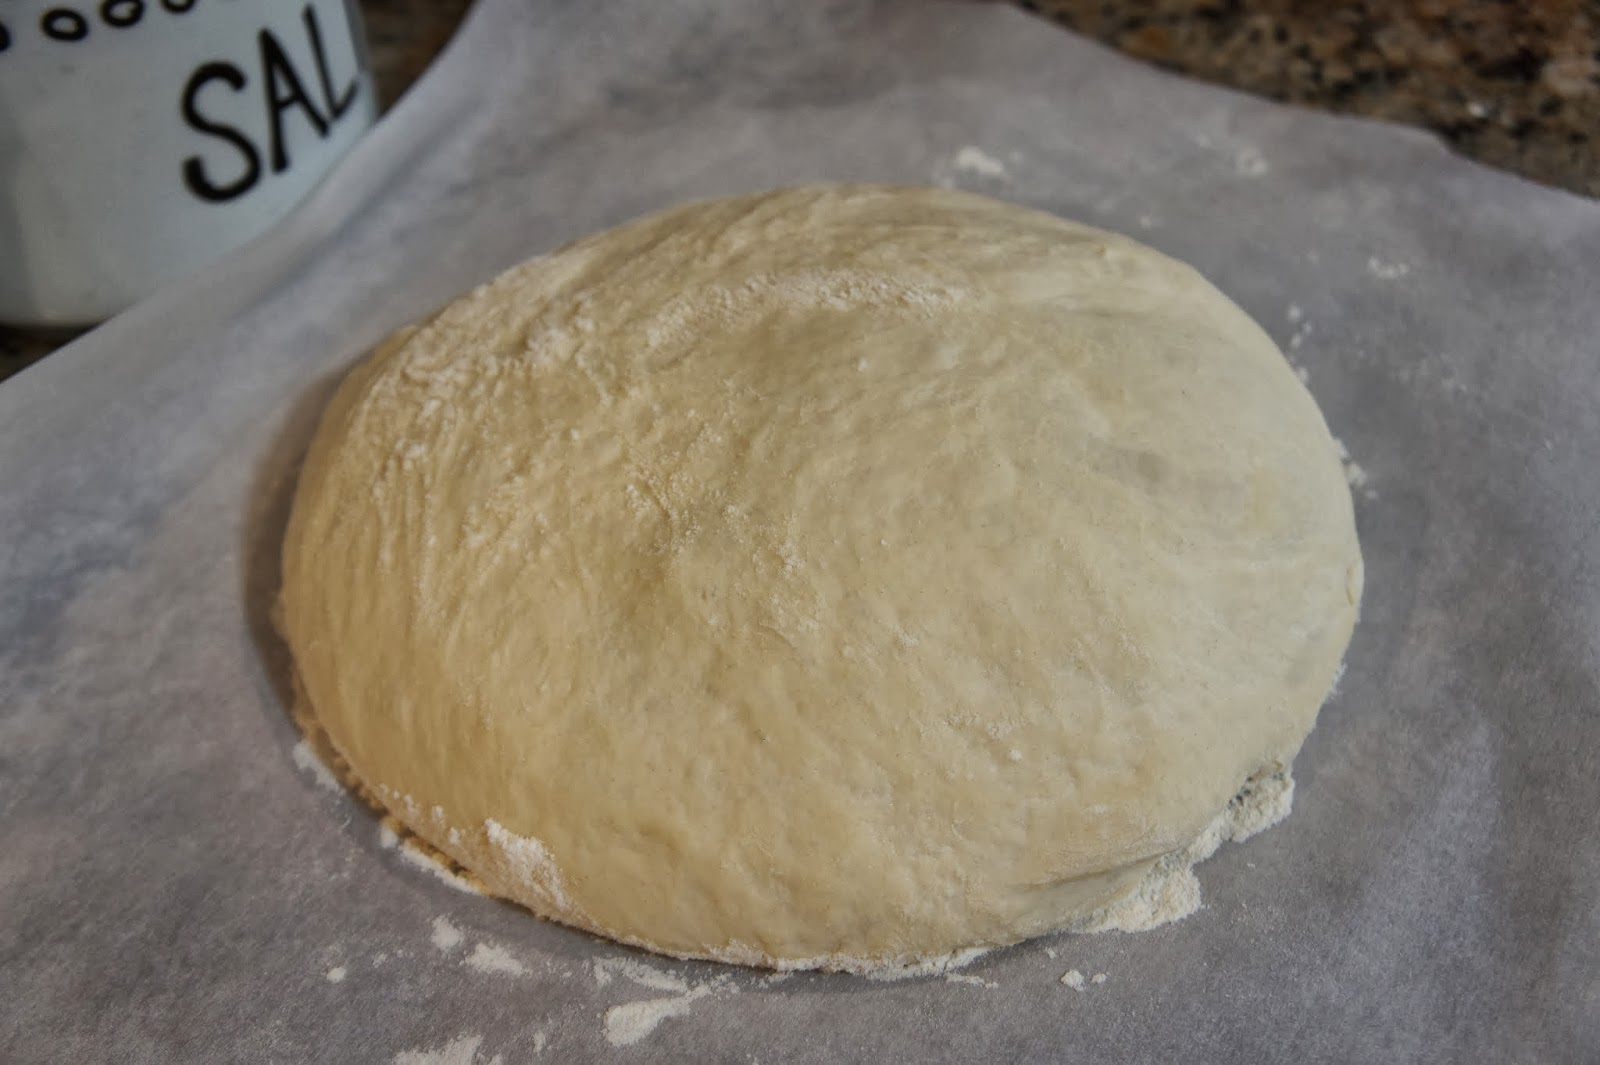
Now, spread a piece of parchment paper on the counter and generously dust it with flour. 
 
Scrape the dough from the bowl onto the floured surface. Using generously floured hands, fold the dough over once, and then fold again.  Gently form the dough into a round shape (this will be the shape of your loaf!).

Allow the dough to rise again, uncovered, for 45 minutes.

When it is done rising, cut three slits in the top of your bread using a very sharp knife.  This will make your bread picture-perfect!  Place the bread, parchment paper and all, on a flat baking sheet.


Now it's time to bake!  Preheat the oven to 450 degrees, and make sure you have two racks to work with.


On the bottom rack, place a metal baking dish (as seen in the photo above) filled with 1 cup of water.  Place the bread on the baking sheet on the top rack and bake for 20-25 minutes.

And here you have it!  This loaf turned out a bit browner than my first because the doorbell rang just as I should have been taking it out of the oven.  However, the crust is just the right crispness!

The end result is a soft, delicious bread, great with soup, or butter, or as a sandwich.  In fact, my kids have been asking me to make this again.  Won't they be happy when they get home from school today?!

I hope you enjoy this as much as we have!


Sep 4, 2013

How to Save Money on Spices


Call me a slow learner, but I just realized that our local grocery store has a bulk spice section!  Actually, I don't think it's that I'm such a slow learner, but that I usually find myself zooming through the store with my list and several children in tow and I have never taken the time to really get to know my store!

So perhaps that is Tip #1 for you today:  Take time by yourself to stroll slowly through your store, noticing what exactly they offer, how much it costs, and where it is located. Not only did I discover the bulk spice section, but I realized that our store has a fairly impressive section of health/natural foods and supplements.  So good to know!

Which brings us to my main tip for you today.  This week I needed to buy poppy seeds.  They come in a little bottle like this in the regular spice aisle:

In case you can't see it, that is 1.25 ounces for $3.18, which works out to $2.54 per ounce, or a whopping $40.64 per pound!  Wow, those poppy seeds are precious!

Come with me to the far side of the store where we find the bulk spices.  As you can see, the array is extensive.


I didn't know exactly how much poppy seed I would need, so I just scooped a bit into the little plastic bags provided, marked the PLU number on it, and weighed it.

Here is how I made out:
That is .04 pounds of poppy seed, which works out to .64 ounces.  It should be plenty for my recipe.  In any case, you can see the price per pound on the label:  $7.99 per pound! Hmmm, seems like a MUCH better deal than getting the tiny bottle from McCormick!  I got just the right amount and for only 32 cents!

I think this is especially a great way to go if you only need a little bit of a particular spice.  Don't we all have bottles of spices in our pantries that we used once or twice, and now they've been there for years?!

(On that note, they say once a jar of ground spice has been opened, it should be used within 6 to 9 months in order to preserve maximum flavor.  Whole spices will keep much longer.)

What other things do you buy in bulk?  I wish our local store had a better selection of grains in bulk.  Maybe I'll have to request that.  Share with us your tips for saving money at the grocery store!


Aug 19, 2013

2-Ingredient Pumpkin Spice Muffins


I've made these yummy pumpkin spice muffins for family breakfasts, teacher appreciation events, bake sales, you name it.  They are always a hit, and without fail someone will ask me for the recipe.  The taste reminds me of the pumpkin loaf from Starbucks.  

The funny part?  These are the easiest muffins you'll ever make, and you only need two or three ingredients!

What you need:

1 Box Spice Cake Mix
1 Can Pureed Pumpkin (NOT pumpkin pie filling)
Pumpkin Seeds (Optional)

What you do:

Heat oven according to instructions on box for cupcakes.  

Grease or line muffin tin.  

Empty dry cake mix and pumpkin into large bowl.  Nothing else goes in here, no matter what the box tells you to do.  Blend cake mix and pumpkin with a hand mixer for 30 seconds, then mix for about two minutes or until everything is blended.  Don't panic!  This will be THICK, kind of like cookie dough.  Don't get crazy and add water or eggs or anything.  Trust me.  Just use a spoon or two and pop the mixture into the muffin tin.  

You can top with pumpkin seeds here, if you like.

Bake according to cake mix directions.  (I usually have to bake mine about a minute or two beyond what the box says.  A toothpick should come out clean when they're done.)

If you don't put the seeds on top, they look quite "rustic," I'll say.  Our family lovingly calls them Ugly Muffins.  They might not be much to look at, but they are delicious!  Make a batch of these, and you'll see.

Enjoy!


Jul 26, 2013

Bake a Cake IN a Jar

I don't just mean PUT and SERVE a cake in a jar...I mean actually BAKE it in the jar.  No really!  It's SO easy, you don't even know.  Well, after you read this you will.  Super, super easy and so, so fun.  Here's how you do it...

First you'll need mason jars.  I purchased a dozen at my local grocery store.  I chose half pint size because that's the size I wanted.  I've seen recipes that use full pint jars as well.  Really, it's up to you.  Wash your jars thoroughly and allow them to dry. 
Next, mix your cake batter.  Any cake batter will do.  I used our favorite Betty Crocker Yellow Cake mix.  Feel free to make something from scratch (you'll have to explain to me later WHY you would actually do this instead).

Using a narrow serving spoon, fill the jars 1/4 of the way. (You'll notice that in the pictures, my jars were a little more full.  This ended up being too full and didn't leave enough room at the top after they baked.)  Wipe any excess from the sides.  
Place the jars on a cookie sheet and bake them according to the instructions for cupcakes. (approximately 13-15 minutes based on my experience).  I cooked just 4 at a time, just to make sure I was doing it right, but you could fill the cookie sheet if you wanted to.  Allow them to cool completely.  (Notice how these are too full?  I just cut some off the top to make room and made the next batch smaller.)

Now it's time to let your imagination go wild!  The rest of the jar can be layered with all sorts of toppings, from fruit to candies and frosting to decorations.  For my daughter's cakes, I decided to go with a strawberry shortcake style jar.  I sliced fresh strawberries and tossed them with a bit of sugar.  I made homemade whipped cream (This is my favorite, tried and true recipe.  You'll see it at the bottom of the page, after the shortcake recipe.)
Once they were full, I used scraps of fabric I already had to cut squares and decorated the tops with them.  
I've seen others use decorative paper, stickers, glitter or anything you like to add a little something.  You can tie ribbon and create personal labels.  They can be as fancy or as rustic as you choose. 

This was a HUGE hit for my daughter's birthday. 
I will do this again soon, maybe for a dinner party or book club. Oh, check out my other "in a jar" posts for jam and butter.  Apparently, food in a jar is my schtick!!


Jun 28, 2013

Your Grocery Shopping Rut - Dare to be Different


I don't know about you, but when it comes to cooking, no matter how hard I try to "think outside the box", it never works.  I always end up with the same 8-10 basic meals ALL....THE....TIME.  I mean, how am I supposed to encourage my kids to be adventurous in their eating when I don't cook that way!?

So recently, I came up with an idea that inspired me, and I hope it will inspire you.

On your next trip to the grocery store, try this:  replace EVERYTHING, and I do mean EVERYTHING, in your usual shopping cart with something different.  And just to clarify, I don't mean trading Ruffles for Wavy Lays or Aunt Jemima for Mrs. Butterworth.  I mean PICK SOMETHING DIFFERENT.  Now, I'll let you have your staples:  milk, eggs, etc.  But to really get in the spirit of it, anything you can trade out, DO IT.  Here are a few examples:

Instead of.........try
regular rice.......quinoa
ground beef.......ground turkey
chicken breasts.......pork loin chops
strawberries.......blueberries
pizza dough/crust.......Naan bread
ranch dressing.......balsamic vinaigrette 
low fat yogurt.......Greek yogurt
white flour.......unbleached 100% whole wheat flour
Fritos.......pita chips
orange juice.......grapefruit juice

See what I mean?  Get your family's taste buds moving.  Get out of the rut.  Your family may actually learn to like new things.  And if not, you might all lose a few pounds! 


Jun 17, 2013

Get More From Canned Frosting


I read at A Subtle Revelry that you can whip up your store-bought frosting and it will double in just a short time.

I was skeptical but just had to try it.

I started with a Creamy Supreme Classic White frosting from Pillsbury.

Here it is in the bowl before I whipped it:
And after:
Not sure it quite DOUBLED, but it did increase in volume.  I did notice at the grocery store that the same size can of frosting for the whipped version weighed less than the non-whipped version, though not half as much.  So that tells me that this is a legit tip, in theory.  

My only thought is that it isn't doubled, but it is increased (in my experiment anyway).  I just used a regular hand mixer, so it might be different with a stand mixer.  Also I suppose it might have increased even more if I had whipped it longer.

Obviously if you're adding air to it, it's going to fill it out, which should increase the surface area you're able to frost with the same amount of frosting.  
Verdict?  Give it a try if you're in a rush and short on frosting.  Good tip!


May 29, 2013

Bake this for dinner!


I keep reading that it is a good idea to try to eat vegetarian at least a couple of times a week.  The problem for me has always been that my kids seem to really like meat!

I stumbled on this recipe in a little flyer I picked up at Whole Foods Market a few years ago, and decided to try it.  First, it sounded like something we would all like.  Second, it was easy peasy!

I'm sharing it with you here, with a few of my own variations.  In the event that you are like me, trying to feed your family unprocessed food as much as you can, this is a great and easy place to start! 


Mexican Quinoa Bake
serves 4

1 cup white or red quinoa (pronounced keen-wah); find it with the other grains and read about its benefits here
2 cups water, plus 3 T.
1 small white onion, finely chopped
2 cloves garlic, minced
1/2 cup white mushrooms, finely chopped
1 small red pepper, chopped
I handful cilantro, chopped (leave it out if you are a cilantro-hater!)
1/2 to 1 cup of green kale or spinach, roughly chopped
1 can refried beans (try the vegetarian variety to make it even more healthy)
cumin, chili powder and fresh ground black pepper to taste

Preheat oven to 350 degrees.

Add quinoa and water to a saucepan.  Bring to a boil and reduce to a simmer, covered, for 12-15 minutes.

Meanwhile, add 3 tablespoons of water to a saute pan, and saute onion, garlic, mushrooms, red pepper and cilantro until soft.  Use more water as needed.  Add in the kale or spinach and cook until greens turn bright green.
Drain excess water and transfer to a large mixing bowl.  Add cooked quinoa and refried beans; mix well.  Season to taste with cumin, chili powder and black pepper.
You notice I didn't even bother to use a mixing bowl; I just mixed it all in the saute pan!
Coat a loaf pan with cooking spray, or line it with parchment paper.  Scoop mixture into the dish and spread evenly.  Bake 20-25 minutes, or until top is slightly crispy.

Here is what I have discovered:  don't worry if you don't have all the veggies this calls for.  I have made it without mushrooms.  I have added zucchini or more kinds of peppers.  It really is a very forgiving dish, in which you can use whatever you have on hand vegetable-wise, and it will most likely turn out just delish!