Pages

Showing posts with label Kit. Show all posts

Oct 23, 2013

Easy Homemade Caramel Sauce


I've been making this cake from Martha Stewart for the last 6 months or so, pretty much every time I need a very yummy and fairly uncomplicated dessert for something.  

Now that it's officially fall, there is no better time than now for this cake!  But even better and easier and more versatile is the CARAMEL SAUCE that goes with this cake!

I made the cake last Sunday for a church lunch, and Monday morning I found myself with a little cup of leftover caramel sauce.  It was just sitting there, on the kitchen counter, calling my name.  At least I think it was calling my name. It sure sounded like it to me.

Anyway, the next thing I knew, I had cut a juicy apple into quarters and was dipping each slice into the rich, buttery caramel sauce. And yes, I did double dip.  I knew there would be no leftovers today.

It seemed only fitting that I leave you with a few easy peasy recipes so that YOU can make your own caramel sauce.  It's delicious!  In fact, my son informed me last night that I need to make more so that he can just eat it with a spoon.  Not a bad idea.

Here is the easy recipe from Martha that goes with the apple spice cake.   You can find a very similar one on her website here.  

You will need this cast of characters:


1 cup brown sugar
1 stick of butter (Martha says unsalted, but I say whatevs)
1/4 cup evaporated milk
1 teaspoon vanilla extract
a pinch of salt

Combine all ingredients in a small to medium saucepan (heavy-bottomed is nice to guard against burning).  Cook over medium heat, stirring continually, until it's the desired consistency.

See how easy that is?!?

If you find yourself without evaporated milk, no worries.  You can use heavy cream or even regular milk. Poke around online and you'll find all kinds of different recipes, some very complicated and scary and others not. I like this one because it is very simple, fool-proof, really.


What else can you do with caramel sauce?  Here are a few ideas:  eat it with a spoon or drizzle it over any number of things, including ice cream, baked pears or apples, or baked goods.  You could also put it in a cute jar and give it as a gift!

Now get to it!  A delicious snack awaits!


Oct 9, 2013

Delicious No-Knead Artisan Bread


Last week was my turn to host book club, and I wanted to make a delicious meal for my "lady friends" (that's what my children call my book club friends).  I was making one of our favorite soups and a great salad; seemed to me like a nice, crusty bread would be perfect with that!

So I did what people do nowadays; I googled "artisan bread recipe".

I found a recipe here that seemed like a good one, and pretty easy. I made it that afternoon and got rave reviews at book club that night!

So here I will share with you the recipe that belongs to Natasha at Natasha's Kitchen.  Even if you're not really a bread maker, or a baker, you can do this!  It's only got four ingredients, and seems to be pretty much fool-proof!  I hope you give it a try.

Here's what you do (with apologies for the grainy photos; it was early this morning and I just couldn't get enough light!):

First, add 1 1/2 cups of very warm water to a large bowl. Sprinkle in 1/2 tablespoon of salt and 3/4 tablespoon of yeast. 

Stir and let it sit for a minute or two.  It will look like this.

Gently stir it again, and then measure out three cups of regular flour and add to the liquid mixture. 


Quick tip:  do you know the correct method for measuring out flour in baking?  

Use a spoon to lightly fill the cup measure.  Then use the straight side of a table knife to level the flour.  You never want to pack down the flour when you're baking.  Just in case you didn't already know!

Using a wooden spoon, stir the dough until it forms a rough ball, as shown.  

Cover the bowl with a loose-fitting lid or with plastic wrap. Allow the dough to rise for 2 hours.

Quick tip:  Yeast rises better in a warm-ish environment.  If my house is drafty or cool on a baking day, I will turn my oven to a low temperature, and sit the dough bowl on the oven to rise.  It gives it just enough warmth to rise nicely without taking too long!

Here is the dough after rising 2 hours.

Now, spread a piece of parchment paper on the counter and generously dust it with flour. 
 
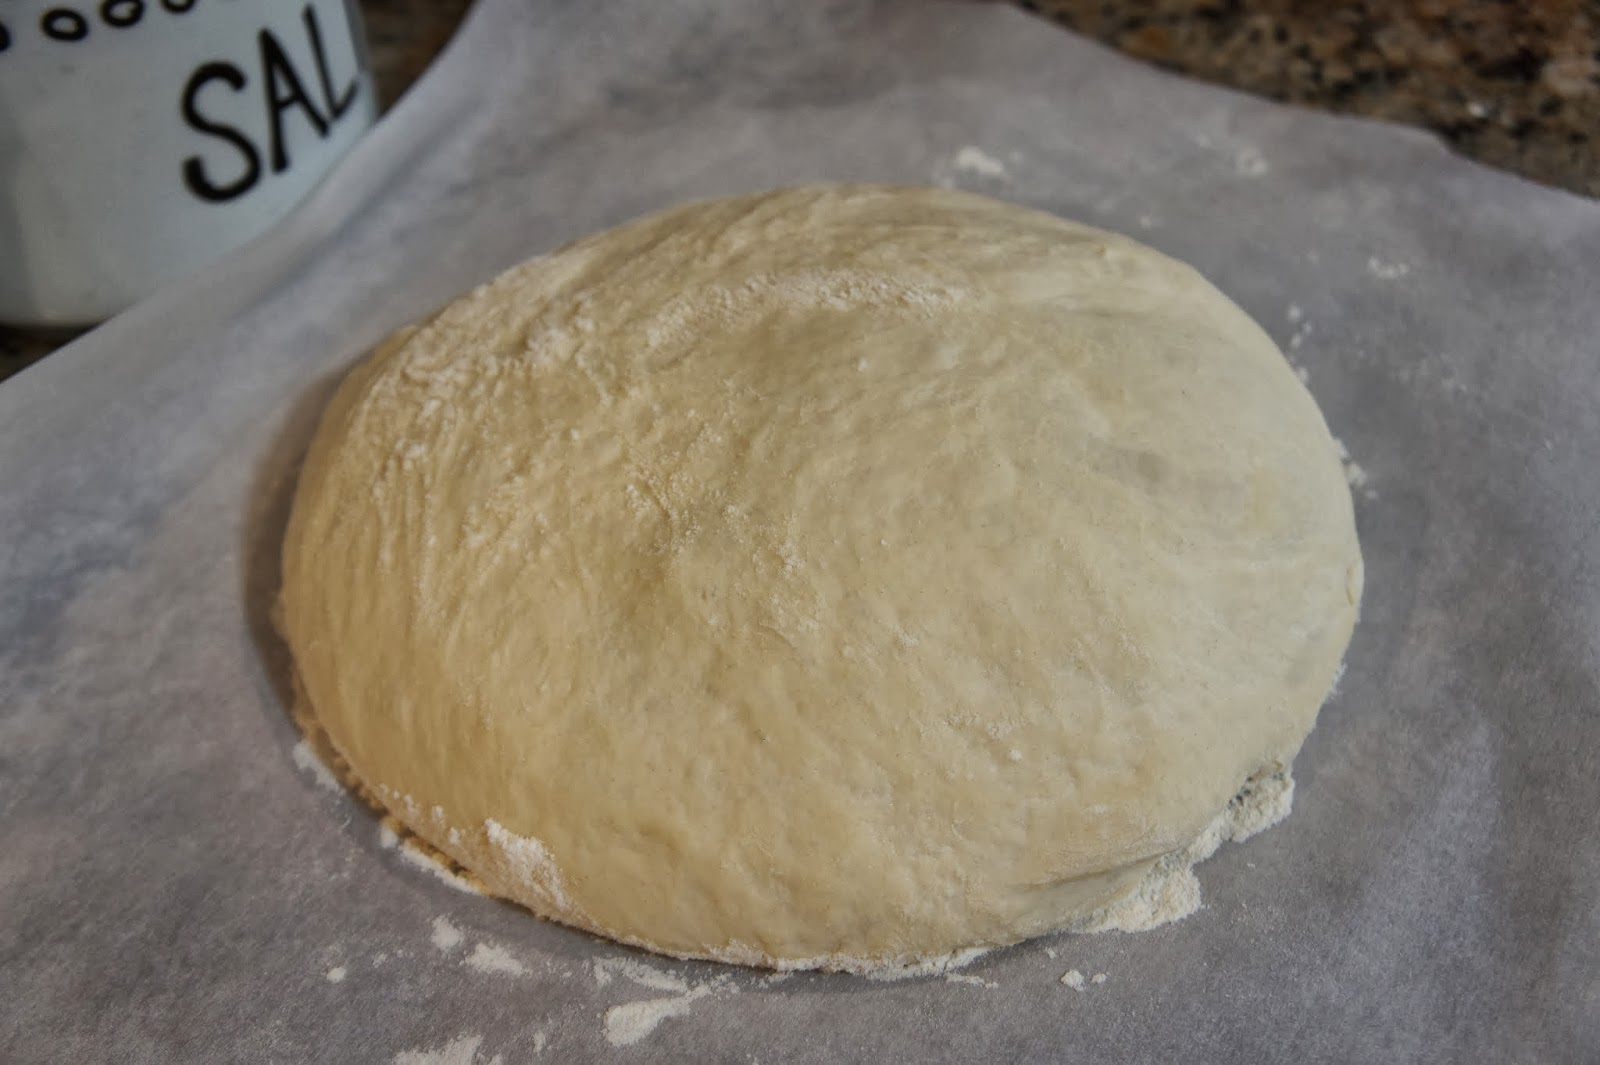
Scrape the dough from the bowl onto the floured surface. Using generously floured hands, fold the dough over once, and then fold again.  Gently form the dough into a round shape (this will be the shape of your loaf!).

Allow the dough to rise again, uncovered, for 45 minutes.

When it is done rising, cut three slits in the top of your bread using a very sharp knife.  This will make your bread picture-perfect!  Place the bread, parchment paper and all, on a flat baking sheet.


Now it's time to bake!  Preheat the oven to 450 degrees, and make sure you have two racks to work with.


On the bottom rack, place a metal baking dish (as seen in the photo above) filled with 1 cup of water.  Place the bread on the baking sheet on the top rack and bake for 20-25 minutes.

And here you have it!  This loaf turned out a bit browner than my first because the doorbell rang just as I should have been taking it out of the oven.  However, the crust is just the right crispness!

The end result is a soft, delicious bread, great with soup, or butter, or as a sandwich.  In fact, my kids have been asking me to make this again.  Won't they be happy when they get home from school today?!

I hope you enjoy this as much as we have!


Oct 2, 2013

Learn Your Child's Love Languages


A few weeks ago I posted about parenting transitions -- those times when we find that the things that have worked for us in relating to and helping our children just don't seem to have the same effect.  I shared a list of books I've read or am currently reading to help me through such a time.

Something I have done that has helped me understand my oldest (and most difficult) child is to find out his love language.  Not sure what that means?  Quick explanation:

The concept comes from the book The Five Love Languages by Gary Chapman.  My husband and I read were required to read this book as part of our pre-marital counseling, and the concepts have really stuck with me.  The premise is that not everyone receives or feels love in the same ways.  For example, I really feel loved when my husband helps me with the things I need to do -- laundry, cooking, ferrying children around, taking care of the car.  Chapman calls these acts of service.  However, my husband feels loved in different ways --when I give him thoughtful gifts, or with physical contact (bow chicka bow bow!).

The same idea is true for our children. Chapman outlines five different love languages.  They are:

* Words of Affirmation
* Acts of Service 
* Receiving Gifts
* Quality Time
* Physical Touch

With the help of a handy and fun online tool, you and your children (and your spouse!) can find out each other's love languages and then set about loving each other better!  

With my fifteen-year-old, I had him take the survey but not tell me the results.  Then I took the same survey and tried to answer as I predicted he would answer.  Guess what? Turns out I know him pretty well!  His top love language is Quality Time, and second is Receiving Gifts.  It was so helpful for me to read this and then to think about ways in which my husband and I can really show him that we love him so that he FEELS it!  I think it also spoke to my son that I wanted to take the time to know more about him.  (As an aside, I have also discovered a sixth love language that applies to this same son, and it is called Foods That Are Delicious and In Large Quantities.  I'm trying to be more intentional in my baking and cooking, as I think this will speak to others in my family, as well!)

I think this Love Language survey is a really useful tool for families.  Last week I told our high school counselor about it, and she said she planned to use it with her students, to help them understand themselves and their own parents and siblings.  

If you want to try out the tool, go here.  It's free and the website has lots of other good information that you may find helpful.  Have fun with it!

Sep 25, 2013

Make a Keepsake Card on Canvas!


Necessity is the mother of invention, they say.  Well, I proved this true this week!

My mom's 70th birthday is very soon and my siblings and I and our spouses have been in cahoots over what gift we would get her and how we would celebrate.  None of us live in the same town, so this was all done over email and text messages.  We finally came up with a lovely keepsake piece of jewelry that I think our mom will love.  I can't wait for her to receive it!

But just a few nights ago I was struck by the realization that she would probably LOVE to also receive something fun and handmade from the grandchildren.  My first thought was to make a "Happy Birthday" banner on butcher roll that the kids and I could decorate, roll up and send.  Alas, the roll of butcher paper was nowhere to be found!  But lucky me!  In all my searching, I found a few cheap canvases that I had purchased last year for the kids to use.  We'll paint that instead!

Alas again!  All my acrylic paints were dried up (Can you tell I'm not the crafty one on this blog?!  Charlotte would never be out of paint!).

Sharpies to the rescue!  We'll make a birthday sign on the canvas with sharpies!

I wrote the initial message and then had the children color it, make designs and sign their names.  I really like how it turned out so far.  I think I'll have the kids add the finishing touches today after school.


I can think of so many fun variations of this project!
* Use a smaller canvas and make a decoupage birthday card/sign for a child or a friend.
* Use the larger canvas to make a seasonal decoration to be used year after year, using paints/sharpies/decoupage.
* Make a birthday sign for the family, similar to the "You Are Special Today" plate.

I plan to attach a hanging strip in the back and send it on to my mother.  I have a feeling she's going to love it!


Sep 18, 2013

Help for Parenting Transitions


Lately, I've felt myself to be in what I call a "parenting transition".  You know how sometimes you're going along and things seem pretty smooth, pretty simple, and then suddenly nothing you were doing seems to work anymore, and you feel like your family is coming apart at the seams? No, only me?  Well, anyway...

I think it may be due to the start of a new school year and new activities, or maybe it's just plain old GROWING, but we and our kids have felt a bit out of step lately.  (That's a nice way of saying there's been a whole lot of fightin'!)

I decided to go back to some of the parenting books that have stood me in good stead over the years, as well as read some that were new (to me).  

You can see my stack in the photo above.  I thought I'd take a minute to tell you a bit about each one, as much as I can, just in case you find yourself in a parenting transition, either now or in the future.

Do I Get My Allowance Before or After I'm Grounded? by Vanessa Van Petten.  The author of this book calls herself a "youthologist" and is quite young herself.  She writes as someone who is in-between the ages of the teen and the parent.  I've not read the whole book yet, but do like her perspective and her focus on relationship-building.

Seize the Moment, Not Your Teen by Bill Sanders.  I picked this one up because I really like the title.  Too often I get swept away by anger or frustration and lose the opportunity to really connect with my teens.  

Grace Based Parenting by Dr. Tim Kimmel.  I have loved this book so far.  This one is definitely from a Christian perspective.  The author emphasizes a tenderness and a coming-alongside that doesn't come so naturally for me.  I need this point of view.

Youth:  The Years from Ten to Sixteen by Arnold Gesell, Frances Ilg and Louise Bates.  This is a much older book and is no longer in print; the copyright in my book is from 1956.  While much of it is outdated, I like that this book is quite comprehensive and detailed.  I have always found the series by these authors on the different ages to be revelatory; this edition is no different.  Best of all, it cover three of my four children!  There is much to take in here, so I read it in small doses.  It's a good resource book.

The Key to Your Child's Heart by Gary Smalley.  This is a classic from back in the 90s.  I've had this book for years (I think my mother-in-law gave it to me before we had children), but had never read the whole thing.  At first, I found it hard to read because it felt like the author was just describing his perfect family, WHICH I DON'T HAVE. Sometimes I find parenting books unbearable because they hold up an impossible standard that just crushes me.  But as I read further, I saw that the author does NOT have perfect family, and he does have some really good suggestions for creating a close-knit family, and for getting closer to kids who may have shut you out.  I liked this one.

Parenting Teens with Love and Logic by Foster Cline and Jim Fay.  I love anything by the Love and Logic people.  I think their ideas make so much sense and REALLY DO WORK if you can discipline yourself to really try.  This is the kind of parenting book to keep on your bedside table and just read a bit every night.  Because we always need help, we always need reminding. 

So there's my reading list, people!  Tell me, what books of resources have you found helpful?  


Sep 4, 2013

How to Save Money on Spices


Call me a slow learner, but I just realized that our local grocery store has a bulk spice section!  Actually, I don't think it's that I'm such a slow learner, but that I usually find myself zooming through the store with my list and several children in tow and I have never taken the time to really get to know my store!

So perhaps that is Tip #1 for you today:  Take time by yourself to stroll slowly through your store, noticing what exactly they offer, how much it costs, and where it is located. Not only did I discover the bulk spice section, but I realized that our store has a fairly impressive section of health/natural foods and supplements.  So good to know!

Which brings us to my main tip for you today.  This week I needed to buy poppy seeds.  They come in a little bottle like this in the regular spice aisle:

In case you can't see it, that is 1.25 ounces for $3.18, which works out to $2.54 per ounce, or a whopping $40.64 per pound!  Wow, those poppy seeds are precious!

Come with me to the far side of the store where we find the bulk spices.  As you can see, the array is extensive.


I didn't know exactly how much poppy seed I would need, so I just scooped a bit into the little plastic bags provided, marked the PLU number on it, and weighed it.

Here is how I made out:
That is .04 pounds of poppy seed, which works out to .64 ounces.  It should be plenty for my recipe.  In any case, you can see the price per pound on the label:  $7.99 per pound! Hmmm, seems like a MUCH better deal than getting the tiny bottle from McCormick!  I got just the right amount and for only 32 cents!

I think this is especially a great way to go if you only need a little bit of a particular spice.  Don't we all have bottles of spices in our pantries that we used once or twice, and now they've been there for years?!

(On that note, they say once a jar of ground spice has been opened, it should be used within 6 to 9 months in order to preserve maximum flavor.  Whole spices will keep much longer.)

What other things do you buy in bulk?  I wish our local store had a better selection of grains in bulk.  Maybe I'll have to request that.  Share with us your tips for saving money at the grocery store!


Aug 28, 2013

Help with School Lunches!


It's that time of the year again!  Time to make the school lunches!  For me, one of the best freedoms of summer vacation is the freedom from packing four school lunches. I am always looking for tips and tricks to make it easier and quicker!

At the same time, our family has been trying to eat more "real food".  And by real food, I mean food that is minimally processed.  Abiding by this idea cuts out a lot of my school lunch go-tos!  No more single serving packages of chips or pretzels!  No more overly-sugared yogurt tubes!  Lots more homemade goods and fruits and veggies!

Today I'm sharing links to several resources around the web that I've found helpful as we begin the school year.  Hope you find something that helps your family, too!

I really try to not have too much disposable stuff in my kids' lunches.  These lunch containers are my favorites.  I'm also going to try these this year.  And to replace those yogurt tubes, I may try smoothies in these silicon freezer tubes.

I use this lunch box but have also seen lots of people who use these.

This blog is all about eating real food and she's got a whole section all about school lunches.  Recipes, too!  I've been spending a lot of time on her site, getting ideas and trying things out. 

This is a great post about making lunches quickly.  Lots of other great ideas on her site.

I also found this good idea for doing a bunch of prep before the week starts so that each morning goes smoothly and quickly (At least in terms of lunch-making!  No guarantees on anything else!)  

As you may  know, there are also TONS of great ideas on Pinterest.  Poke around, see what you find, then come back here and let us know what caught your eye in the comments!

Aug 21, 2013

Three Sieves


With the new school year upon us, I am sure that I will have opportunity to speak to my children about their teachers and friends, both old and new.  In times of transition, discontentment and criticism can easily creep in as we find our way in new settings and new situations.  I hope to help my children (and myself!) keep their words encouraging and hopeful, rather than tearing-down and negative.

In my daily reading the other day, I came across these three sieves, three filters for our words (and even...gasp!...our thoughts).

We can ask ourselves these three questions before we speak:

Is it true?

Is it kind?

Is it necessary?

I don't know about you, but that last one really gets me.  Is it NECESSARY?  I probably say a lot of things that aren't really necessary; they may not serve much of a purpose but to make me feel better.  

While I do plan to share these three sieves with my children, I hope to keep them in mind for myself as I go about my day.

What about you?  Are negative words or gossip a struggle for you?  How can we encourage one another?


Aug 7, 2013

Family Reunion Fun


We just got back from an amazing family reunion and I have to share with you an activity we did that seemed crazy at first, but ended up being one of my favorites.

Are you ready for this?

Are you sure?


Okay, here it is...synchronized swimming.  That's right, at our family reunion we had a synchronized swimming competition.  And it. was. awesome.

This wasn't my idea, so I can't claim any credit for it.  In fact, at first I wasn't very enthused by the idea.  But after watching the three teams perform their routines, I think this idea is a total winner!

Here is how we did it.  Teams were formed randomly, but with effort to get each team balanced with people from each generation.  The oldest team member was my Uncle Steve, who is 80, and the youngest team member was my cousins's son, Isaac, who is 4.  And of course, there were all sorts of ages in between.  We ended up with teams of 5 to 7 people.

Once the teams were formed, we had about an hour to come up with a routine and song and to practice said routine.  We practiced on land and in the water.  We also appointed two or three judges.

Here's what I think is great about this activity:

1.  It gets the generations working together.  So fun to see old and young coming up with ideas together.

2.  Anyone can participate.  My team kept our routine in the shallow end of the pool for our shorter participants, but one team had a participant wearing a life jacket.  So awesome.

3.  It is creative, but also completely silly.  Ridiculous, really.

4.  It made everyone laugh.  Really hard. For a long, long time.  

And just to prove my point, I give you this (very shaky from laughing) video (and please forgive my ridiculous giggling):


I think this idea could work with any number of gatherings, not only family reunions.  

What are some of the fun things you have done at family reunions?  I'd love to have more ideas for the next time we get together!


Jul 31, 2013

Whatcha Wearin' Wednesday

Today I'm posting a little outfit that is good for kickin' around town but also looks nice enough to go to a casual lunch or a meeting at the kids' school.  


Again, please excuse my squinty eyes!  I promise, I will get this style photo thing down!  

So here we have a simple navy and white striped t-shirt with 3/4 length sleeves, paired with khaki bermuda shorts.  The jewelry is mostly gold-tone, as are the flip-flops.


WHAT I LOVE ABOUT THIS OUTFIT:

* The stripes on the t-shirt seem nautical and summery to me.  And though the sleeves are a bit long for summer in Texas, they push up easily!

*  The necklace is a good weight; it hangs nicely and goes with so many things.

* Navy, khaki and white - classic colors

* I love using gold shoes as a neutral.  So much more fun than taupe or beige.  Gold is a go-to for me.  For cooler weather, I have a pair of gold flats that go with everything!

THE DETAILS:
t-shirt - Uniqlo
shorts - Old Navy
necklace - The Limited from waaaay back - I'm talking high school!
earrings - gift from parents
bracelet - Macy's
flip-flops - American Eagle by way of TJ Maxx

I'm linking up this week with The Pleated Poppy and Random Wednesday at Because Shanna Said So.


Jul 24, 2013

Whatcha Wearin' Wednesday

Whatcha Wearin' Wednesday is back!  It's been a while, but I thought I would post an outfit that I've worn recently.


First, I would like to ask you to ignore my squinty eyes in this photo!  It was a tad sunny, but otherwise a good time for photo-taking.  So there it is!

I love this yellow dress that I found at Old Navy on clearance.  It has a circular eyelet pattern on it and a simple zip up the back.

Here I wore a skinny metallic pink belt to try to define the waist a bit.  The turquoise wedges are really fun and turquoise is a go-to color for me in the summertime.  It goes with almost everything!


The necklace was made by me several years ago in my making-jewelry phase.  This is one of my favorites, and I've gotten a lot of mileage from it!


I didn't wear earrings or a bracelet, as the bright colors and the necklace are enough for me.

WHAT I LOVE ABOUT THIS OUTFIT:

* Color!  I am a color addict and I love putting several bright colors together.  

* The ease of the dress.  It is a breeze to zip and go.  I love dresses for this reason.

* Wedges make me feel tall.  And powerful.

THE DETAILS:
Dress - Old Navy 
Shoes - TJ Maxx
Belt - Target
Necklace - made by me

I'm linking today with The Pleated Poppy and Random Wednesday.